
Whirlpool WED1900TC1 Dryer — Common Problems and Replacement Parts
Need the replacement part? Search your model number at for guaranteed fit and fast free shipping.
Understanding the Problem
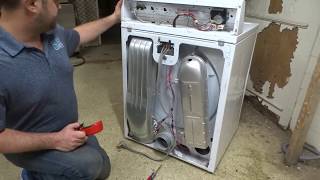
The Whirlpool WED1900TC1 is an electric tumble dryer that commonly shows several repeatable faults as it ages: no heat, poor heating/long cycles, drum not turning, loud noises, or intermittently stopping mid-cycle. These symptoms usually stem from a small group of mechanical or thermal components (fuse, thermostats, heating element) or from wear items (belt, idler, rollers) rather than from the cabinet or drum itself. Diagnosing this model typically follows two tracks: heating/temperature faults and mechanical/tumbling faults. Heating faults are most often caused by a failed thermal fuse, open thermostat, or a broken heating element. Tumble and noise problems usually point to a worn belt, seized drum rollers, failed motor bearings, or a bad idler pulley. Proper diagnosis uses visual inspection, airflow checks, and simple electrical continuity tests with a multimeter before buying parts.
Common Symptoms
No heat while drum tumbles; takes too long to dry; dryer won't start but has power; loud squealing or grinding noises; drum doesn't turn.
Common Causes
- Blown thermal fuse or open high-limit thermostat from restricted venting or overheating
- Broken heating element or open cycling thermostat causing no or inconsistent heat
- Worn belt, seized drum rollers, idler pulley, or motor failure causing no tumble or loud noises
Popular Parts That Fix This Problem
These are the most common replacement parts that fix this problem. When you're ready to order, click below to find the right part at ProsourceParts.com — just search by your appliance model number for a guaranteed fit.

Helpful Repair Tip
Before replacing parts, confirm with a continuity test: unplug the dryer, remove the component (thermal fuse, thermostats, element) and check for continuity with a multimeter. Also inspect for obvious damage, burnt smells, or restricted venting — many 'no heat' problems are caused by blocked vents, not the heating assembly.
Frequently Asked Questions
How do I tell if my WED1900TC1 has a bad thermal fuse or a blocked vent?
A blown thermal fuse typically causes the dryer to tumble but produce no heat. First, check the venting: disconnect the vent and run a short cycle — if heat returns, the vent is blocked and needs cleaning. If no heat with the vent disconnected, unplug the dryer and test the thermal fuse for continuity with a multimeter; an open (no continuity) thermal fuse means it must be replaced. Also inspect the thermal fuse and thermostat for visible burn marks or damage.
Can I replace these parts myself or should I call a technician?
Many WED1900TC1 repairs are DIY-friendly if you are comfortable unplugging the appliance, removing the dryer front or rear panel, and using basic tools. Replacing items like the thermal fuse, heating element, belt, idler pulley, and drum rollers is commonly done at home. Always unplug the dryer first and follow step-by-step guides or manufacturer instructions. If the repair requires handling the motor, control board, gas-related components (not applicable to electric models), or if you find electrical damage, call a qualified appliance technician.
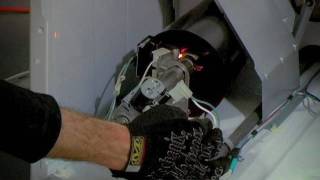
Related How-To Videos

Real DIY Repair Stories
Be the first to share your repair story!
Share Your Repair Story
Your experience helps other homeowners fix their appliances. Tell us how it went!
Can't Fix It Yourself? Find a Local Technician
It's perfectly okay to call a professional. Some repairs require specialized tools, deep teardowns, or dealing with complex systems that are better left to the pros.

Find the Right Part for Your Appliance
Don't guess — search your exact appliance model number at ProsourceParts.com to find the correct OEM compatible replacement part. They offer fast free shipping, guaranteed fit, and thousands of parts in stock.
Your Free Parts Videos
Whether your dishwasher won't drain, your dryer stopped heating, or your fridge isn't cold, we've created simple repair guides for the most common appliance problems homeowners face. Each guide explains what's going wrong, the most likely causes, and which replacement parts fix the issue. When you're ready to order, we link directly to ProsourceParts.com where you can search by model number and get the right part shipped fast.