
Whirlpool WDTA50SAHZ0 Dishwasher Leaking Under the Door – How to Diagnose & Fix
Need the replacement part? Search your model number at for guaranteed fit and fast free shipping.
Understanding the Problem
Brief explanation: A leak under the lower door of a Whirlpool WDTA50SAHZ0 usually means water is escaping the tub/door interface, dispenser area, or a front hose/connection. The most common causes are a failed lower door gasket (door boot), a leaking detergent dispenser, a loose/clogged hose or clamp at the sump, a cracked tub or a door that isn’t seating correctly because of broken hinges or springs. Step-by-step diagnostic and repair steps: 1) Reproduce & locate the leak: - Wedge dry paper towels or a shallow tray under the door seal and run a short wash cycle (quick wash). Watch where the first droplets appear — front center, left/right corner, or from behind the kickplate. This pinpoints the source. 2) Inspect the lower door seal (door boot): - Open the door and look along the lower inner edge. If the boot is torn, flattened, missing, or not seated in its channel the seal will leak. Press the gasket into the channel; if it won’t hold or shows damage it should be replaced. 3) Check the dispenser and door inner panel: - Operate a cycle and watch the dispenser area. If water is curling out from around the dispenser or the dispenser housing is cracked, replace the dispenser. To inspect more closely, remove the inner door panel to see the dispenser mating surface and dispenser gaskets. 4) Remove the kickplate and inspect under the machine during a cycle: - Look at the sump, drain pump, and hoses for active drips. Tighten any loose hose clamps and inspect hose condition. A failing pump seal or a loose clamp is a common source of under-door leaks. 5) Check spray arms and filter area: - A blocked filter or spray arm that’s cracked or directs water toward the door seam can splash water out. Clean filters and inspect spray arms for damage. 6) Check door alignment, springs and hinges: - If the door sags or doesn’t close tightly, water will spray out the bottom. Inspect torsion springs, hinge cams and strike; replace any worn parts and adjust door tension if needed. 7) Inspect tub and inner door for cracks: - With the inner door panel removed, inspect the tub near the front seam and around dispenser mounting for hairline cracks. Small cracks on the plastic inner door/tub may require tub or door replacement. 8) Make the repair (common fixes): - Replace lower door gasket (door boot): Remove inner door panel screws, peel out old gasket, clean channel, seat the new boot fully into the channel, reassemble. Ensure the gasket isn’t twisted and seals along full length. - Replace dispenser assembly: Remove inner door panel, disconnect wiring harness and actuator cables, remove dispenser fasteners, install new dispenser and test operation before reassembly. - Tighten/replace hose clamps or replace damaged hoses: Remove clamp, replace clamp and/or hose section, resecure and pressure-test by running a cycle. - Replace drain pump/sump if leaking: Disconnect power, remove lower access panel, disconnect electrical and hoses from pump, remove pump mounting fasteners, install new pump and test. - Fix door alignment: Replace broken springs/hinges and adjust door so it sits level and closes with even pressure. 9) Test after repair: - Clean up, run a full cycle with observation and confirm no leaks. Recheck after first few uses. Safety note: Always disconnect power to the dishwasher (turn off circuit breaker) before removing panels or doing electrical work. Turn off the water supply before disconnecting hoses. Use towels or a small pan to catch water when you disconnect plumbing. If you’re uncomfortable with electrical or plumbing steps, call a qualified appliance technician.
Common Symptoms
Water pooling on the floor in front of the dishwasher, wet bottom edge of the lower door, visible dripping from the door seam during or after cycles, machine runs but leaves water on floor.
Common Causes
- Damaged or improperly seated lower door gasket (door boot)
- Leaking or cracked dispenser assembly or dispenser seal
- Loose/clogged hose or failed drain pump/sump seal under the kickplate
- Door alignment or hinge/torsion spring failure causing door not to seat
- Cracked tub or inner door plastic near dispenser or front seam
Popular Parts That Fix This Problem
These are the most common replacement parts that fix this problem. When you're ready to order, click below to find the right part at ProsourceParts.com — just search by your appliance model number for a guaranteed fit.

Helpful Repair Tip
Place paper towels or white tissue under the door and run a short cycle to see exactly where the water first appears — that single observation quickly identifies whether the leak starts at the dispenser, center bottom, or under the kickplate.
Frequently Asked Questions
My dishwasher only leaks when I run a high-temperature or heated dry cycle. Is that important?
Yes. High-temp cycles raise pressure and water spray intensity inside the tub and can reveal marginal seals, cracked plastic, or a gasket that only leaks under higher pressure. If the leak appears only on hot cycles, focus on dispenser seals, the lower door gasket and any brittle plastic near the dispenser or tub seam.
Can I fix this leak myself or should I call a pro?
You can fix many common leaks yourself if you’re comfortable removing the kickplate and inner door panel, replacing gaskets, hoses, or the dispenser, and you have basic hand tools. Always disconnect power and water first. Call a professional if you find a cracked tub, need to replace the entire inner door assembly, or if the leak source is unclear after the diagnostic steps.
Related How-To Videos


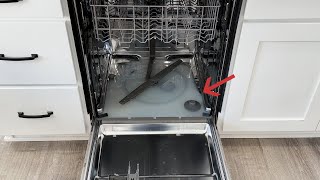
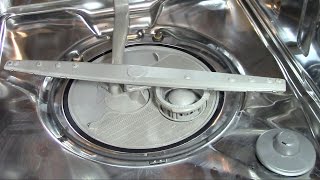
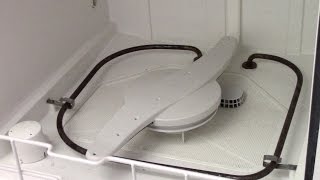

Real DIY Repair Stories
Be the first to share your repair story!
Share Your Repair Story
Your experience helps other homeowners fix their appliances. Tell us how it went!
Can't Fix It Yourself? Find a Local Technician
It's perfectly okay to call a professional. Some repairs require specialized tools, deep teardowns, or dealing with complex systems that are better left to the pros.

Find the Right Part for Your Appliance
Don't guess — search your exact appliance model number at ProsourceParts.com to find the correct OEM compatible replacement part. They offer fast free shipping, guaranteed fit, and thousands of parts in stock.
Your Free Parts Videos
Whether your dishwasher won't drain, your dryer stopped heating, or your fridge isn't cold, we've created simple repair guides for the most common appliance problems homeowners face. Each guide explains what's going wrong, the most likely causes, and which replacement parts fix the issue. When you're ready to order, we link directly to ProsourceParts.com where you can search by model number and get the right part shipped fast.