
Whirlpool GU2275XTVQ3 — Common Problems & Step-by-Step Repair Guide
Need the replacement part? Search your model number at for guaranteed fit and fast free shipping.
Understanding the Problem
This guide covers common problems and practical repairs for the Whirlpool GU2275XTVQ3 dishwasher. Below you will find likely causes for the most frequent symptoms (won't start, won't fill, won't drain, leaks, poor cleaning, noisy operation, and control/display faults) plus step-by-step diagnostic and repair actions you can perform at home. 1) Dishwasher won't start or won't run a cycle - What to check first: house power, door latch/switch, control lock, thermal fuse / main control. - Diagnostic steps: 1. Confirm power: check breaker and outlet (if corded). If other appliances work on the same circuit, power is present. 2. Open and close door: listen for the door latch click and ensure the door closes fully. 3. Test door latch: with power off, use a multimeter set to continuity across the door switch/latch; it should show continuity when door is closed. 4. Verify control lock / child lock is not engaged (consult manual labels). 5. If the unit is completely dead, remove toe kick and check the thermal fuse on/in the control housing for continuity. - How to fix: - Replace a faulty door latch assembly if it fails continuity or doesn't actuate. - Replace thermal fuse or main control board if the fuse has no continuity and the board shows no signs of life (replace only after verifying no wiring or short caused the fuse to blow). 2) Dishwasher won't fill with water or low water level - What to check first: water supply shutoff, inlet valve, float assembly, water pressure. - Diagnostic steps: 1. Ensure the hot water supply valve under the sink is fully open. 2. With the machine starting fill step, listen for a humming at the lower front (inlet valve). If silent and no water, inlet valve may be bad. 3. Remove toe kick, disconnect power, and test the water inlet solenoid with a multimeter for continuity. 4. Inspect float and float switch in the tub or base—make sure the float moves freely and the float switch has continuity when the float is up. 5. Check household hot water pressure; low pressure will cause slow or no fill. - How to fix: - Replace the water inlet valve if it fails the continuity test or does not open under voltage. - Clean any inlet mesh screens/screens on the supply hose. - Clean or replace a sticking float/float switch if it fails to activate. 3) Dishwasher won't drain or has standing water - What to check first: drain hose (kinked/clogged), sink air gap, drain pump, garbage disposal knockout plug. - Diagnostic steps: 1. After a drain step, remove lower access panel, run a drain program, and listen for the drain pump operation. 2. If pump runs but water remains, check for blockage at the pump inlet, filters, and sump area; remove debris and check impeller for damage. 3. If pump doesn't run, check for power at the pump during drain cycle (use multimeter with control calling for drain). 4. Inspect the drain hose for kinks or obstructions; if connected to a disposal, confirm the knockout plug was removed when installed. - How to fix: - Clear any clogs in filters, sump, and drain hose. - Replace the drain pump if it fails to run or has no continuity/impeller damage. - Re-route or replace kinked hoses and clear disposal knock-out plugs. 4) Dishwasher leaks (under door or from bottom) - What to check first: door gasket, door springs/adjustment, tub crack, hose/clamp connections, water inlet valve. - Diagnostic steps: 1. Inspect door gasket/seal for tears, gaps, or hardened spots; run a short cycle and observe where water appears. 2. Check door alignment and hinges—if the door isn't closing flush it can leak from the top/bottom. 3. Inspect hose clamps at inlet and drain for tightness and signs of spray. 4. Remove lower access panel after running a small fill cycle and watch for leak source at pump seals or tub. - How to fix: - Replace a worn or damaged door gasket; replace door springs/adjust and realign door if sagging. - Tighten or replace hose clamps and replace cracked hoses. - Replace pump or pump seals if leak originates from pump area. 5) Poor cleaning, food left on dishes - What to check first: spray arms, filters, circulation pump, detergent dispenser, water temperature. - Diagnostic steps: 1. Remove and inspect spray arms for clogs; clear holes with a toothpick and clean filters. 2. Run the hot water at the kitchen sink to ensure the dishwasher starts with hot water (120°F recommended). 3. Confirm detergent dispenser opens during cycle; inspect dispenser for broken actuator. 4. Listen for the circulation pump during the wash—if noisy or weak suspects pump or motor. - How to fix: - Clean spray arms and filters; replace damaged spray arms. - Replace circulation pump/motor if it fails or loses prime. - Replace defective detergent dispenser or actuator. 6) Noisy operation (grinding, humming) - What to check first: foreign objects in sump or spray arms, failing pump/motor, bearings in circulation pump. - Diagnostic steps: 1. Remove lower rack and filter assembly; inspect sump for broken glass, bone, or hard debris around impeller. 2. Run the wash and listen—grinding usually indicates debris; constant humming with no wash action indicates a seized pump. - How to fix: - Remove debris from the sump/impeller area. - Replace a noisy or seized pump/motor assembly. 7) Control/display faults or error codes - What to check first: control lock, ribbon cable connections, water temperature, diagnostic mode codes. - Diagnostic steps: 1. Remove power and check ribbon cable connections between the user interface and main control board. 2. Look for flashing LEDs or error codes; consult the tech sheet (usually taped to the side of the dishwasher or behind the toe kick) for code meanings. 3. If you see obvious burn marks or failed components on the board, replace the control board. - How to fix: - Reseat or replace the user interface/control panel if buttons are unresponsive. - Replace main control board if it fails diagnostics and connections are good. Final safety note: Always disconnect electrical power at the breaker and turn off the water supply before doing internal inspections or parts replacements. Use a multimeter only if you are comfortable and know how to use it safely. If you are unsure, contact a qualified appliance technician.
Common Symptoms
Won't start, won't fill, won't drain, leaks, poor cleaning, loud grinding noises, control/display errors
Common Causes
- Failed door latch or control board (unit won't start)
- Clogged or failed water inlet valve or float switch (no fill)
- Blocked drain hose or failed drain pump (won't drain)
- Worn door gasket or loose hoses/clamps (leaks)
- Clogged spray arms, failing circulation pump, or low water temperature (poor cleaning)
Popular Parts That Fix This Problem
These are the most common replacement parts that fix this problem. When you're ready to order, click below to find the right part at ProsourceParts.com — just search by your appliance model number for a guaranteed fit.

Helpful Repair Tip
To confirm the most common faulty part, run a short cycle and observe/listen: no fill + silent inlet valve = bad inlet valve; motor hum without water movement = faulty circulation/drain pump; visible water under the door with a torn gasket = replace door seal.
Frequently Asked Questions
How do I run diagnostics or read error codes on my Whirlpool GU2275XTVQ3?
This Whirlpool model uses a tech/diagnostic mode accessible via a button sequence and the service tech sheet. The exact button sequence can vary; the quick way to get the procedure and error code meanings is to remove the lower toe kick and find the service sheet (usually taped to the inner cabinet). The tech sheet lists the diagnostic entry method and code flash patterns. If you can't find the sheet, power-cycle the machine, and note any LED flash patterns or error displays and compare them to the tech sheet online or from Whirlpool support.
Should I repair my Whirlpool GU2275XTVQ3 or replace it?
Decide based on age, repair cost, and symptom: if the dishwasher is under 8–10 years and the repair part is a single component (inlet valve, pump, door latch, gasket) the repair is usually cost-effective. If the control board or multiple major components need replacing and repair cost approaches half the price of a new dishwasher, replacement is often better. Also consider energy efficiency and reliability — older units may be more economical to replace if recurring failures occur.
Related How-To Videos


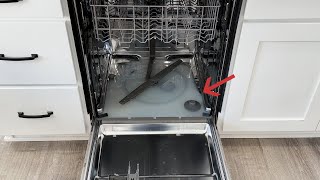
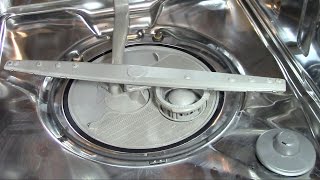
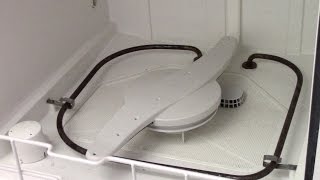

Real DIY Repair Stories
Be the first to share your repair story!
Share Your Repair Story
Your experience helps other homeowners fix their appliances. Tell us how it went!
Can't Fix It Yourself? Find a Local Technician
It's perfectly okay to call a professional. Some repairs require specialized tools, deep teardowns, or dealing with complex systems that are better left to the pros.

Find the Right Part for Your Appliance
Don't guess — search your exact appliance model number at ProsourceParts.com to find the correct OEM compatible replacement part. They offer fast free shipping, guaranteed fit, and thousands of parts in stock.
Your Free Parts Videos
Whether your dishwasher won't drain, your dryer stopped heating, or your fridge isn't cold, we've created simple repair guides for the most common appliance problems homeowners face. Each guide explains what's going wrong, the most likely causes, and which replacement parts fix the issue. When you're ready to order, we link directly to ProsourceParts.com where you can search by model number and get the right part shipped fast.