
Washing Machine E2 / E-3 Error – What Causes It & How to Fix It
Need the replacement part? Search your model number at for guaranteed fit and fast free shipping.
Understanding the Problem
Brief explanation: E2 and E‑3 are generic error codes used by many washer brands. Their exact meaning depends on brand and model, but they most commonly point to one of three groups of problems: drain/pump failures (drain timeout), water level/pressure sensor faults (pressure switch or hose), or sensor/communication errors (temperature sensor, door lock, or control board). Below are prioritized diagnostic steps and practical repair actions you can take at home. If you tell me your washer brand and model I can give model‑specific code meaning and part numbers. Step-by-step diagnosis and repair (follow in this order): 1) Record the exact code and behavior - Write down whether the display shows E2, E‑2, E3, or E‑3 and what the washer is doing (won't drain, won’t fill, won't spin, overfilling, loud noise, etc.). Different manufacturers use the same code for different faults. 2) Basic reset and quick checks - Unplug the washer (or switch off the breaker) for 1–2 minutes, then power back on. Some electronic glitches clear with a reset. - Check for obvious problems: visible water in the tub, unusual noises, burned electronics smell. 3) Check drain and pump (most common) - Symptom signs: washer stops mid‑cycle, water remains in tub, long drain time, humming/noise from pump. - What to do: unplug the machine, open the lower front service panel or access hatch, place towel/bucket under the pump. Inspect drain hose for kinks and the pump inlet for debris (coins, socks, lint). Manually rotate the pump impeller (if accessible) to see if it's jammed. - Test: run a drain/spin cycle while listening — if no pump noise, pump may be dead. If pump hums but doesn't move water, it’s jammed or failing. - Repair: clear debris or replace the drain pump. Replacement is usually straightforward: disconnect power and water, remove access panel, unclip hose clamps, disconnect electrical connector, remove old pump and install new one. 4) Check the drain hose and house drain - Ensure the drain hose isn’t blocked/pinned or inserted too far into standpipe (can cause siphoning). Disconnect and run water through it to confirm flow. 5) Check the pressure (water level) switch and pressure hose - Symptom signs: washer overfills or reports level errors, or shows E2/E‑3 at fill time. - What to do: locate the small rubber hose running from the tub to the pressure switch on the control module. Inspect it for cracks, blockages, or disconnection. Remove the hose and blow through it — you should hear a click from the switch when you blow. - Test: with multimeter, check continuity of the switch contacts while blowing into hose (service manual will show which pins change). If the switch doesn’t click or the hose is clogged, replace the hose or switch. - Repair: replace the pressure hose (cheap) first. If problem persists, replace the pressure switch/water level sensor. 6) Check inlet valve and water fill sensors - Symptom signs: washer won’t fill or overfills then errors out. - What to do: inspect inlet valve screens for debris and the inlet valve for continuity. Replace the inlet valve if no continuity or if hoses/screens are clogged. 7) Check temperature sensor (NTC) and door lock/communication errors - Some brands use E3 to indicate a temperature sensor fault or communication error between modules. Symptom signs: errors at start of cycle, no heat when using hot wash, or machine won’t start because door lock isn’t recognized. - What to do: inspect wiring to sensors and door lock, test NTC with a multimeter (compare resistance to spec at room temp from service sheet), test door lock for proper operation and continuity. - Repair: replace faulty sensor or door lock as indicated. 8) Check control board / wiring harness - If the parts above test good and wiring is intact, the main PCB or wiring harness may be failing. Look for burn marks, bulging capacitors, or loose connectors. Replacing the control board is a final step. 9) Re-test and verify - After repairing or replacing a suspect part, reassemble, reconnect water and power, and run a diagnostic or rinse/spin cycle to confirm the error is cleared. Safety note: Always unplug the washer and shut off water supply before opening panels. If you’re not comfortable working with electrical components or lifting the machine, call a qualified appliance technician.
Common Symptoms
Error code E2 or E‑3 on the display; washer won’t drain or fill properly; water remains in the tub; long cycle or cycle stops mid‑program; washer won’t start or will overfill.
Common Causes
- Clogged or failed drain pump or blocked drain hose
- Faulty water level (pressure) switch or blocked pressure hose
- Sensor or control communication failure (NTC temp sensor, door lock, or main control board)
Popular Parts That Fix This Problem
These are the most common replacement parts that fix this problem. When you're ready to order, click below to find the right part at ProsourceParts.com — just search by your appliance model number for a guaranteed fit.

Helpful Repair Tip
Listen during a drain cycle — if you hear nothing from the pump and water stays in the tub, the drain pump is the most likely cause. If the pump runs but the washer still reports E2/E‑3 or overfills, inspect the pressure hose and pressure switch next.
Frequently Asked Questions
Do E2 and E3 mean the same thing on every washer?
No. E2 and E‑3 meanings differ by brand and model. On many machines E2 commonly points to a drain or water level issue and E3 can indicate a sensor or communication fault, but you should check your washer’s service manual or tell me the brand and model so I can give the exact code definitions.
Can I reset the error code myself?
Often yes — a simple power‑cycle (unplugging or switching off the breaker for 1–2 minutes) clears transient errors. If the code returns, follow diagnostic steps above. Clearing the code without fixing the underlying fault will usually allow the error to come back.
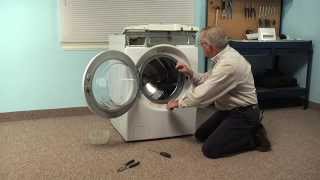
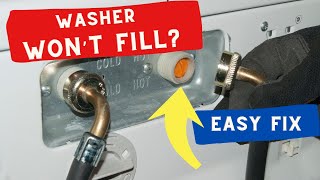
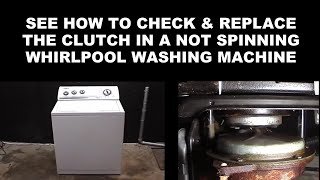
Related How-To Videos

Real DIY Repair Stories
Be the first to share your repair story!
Share Your Repair Story
Your experience helps other homeowners fix their appliances. Tell us how it went!
Can't Fix It Yourself? Find a Local Technician
It's perfectly okay to call a professional. Some repairs require specialized tools, deep teardowns, or dealing with complex systems that are better left to the pros.

Find the Right Part for Your Appliance
Don't guess — search your exact appliance model number at ProsourceParts.com to find the correct OEM compatible replacement part. They offer fast free shipping, guaranteed fit, and thousands of parts in stock.
Your Free Parts Videos
Whether your dishwasher won't drain, your dryer stopped heating, or your fridge isn't cold, we've created simple repair guides for the most common appliance problems homeowners face. Each guide explains what's going wrong, the most likely causes, and which replacement parts fix the issue. When you're ready to order, we link directly to ProsourceParts.com where you can search by model number and get the right part shipped fast.