
Stacking My Washer and Dryer — Installation, Common Problems and Fixes
Need the replacement part? Search your model number at for guaranteed fit and fast free shipping.
Understanding the Problem
Stacking a front‑load washer with a matching dryer is a great space saver but must be done correctly to avoid instability, noise, poor drying, or safety hazards. Below is a practical, step‑by‑step procedure for selecting the right hardware, installing the stack, and diagnosing and fixing common issues. 1) Confirm compatibility and get the right kit - Check both appliance model numbers: usually on a sticker inside the washer door or on the back of the dryer. Manufacturers sell model‑specific stacking kits. If both appliances are the same brand and are front‑load, a matching stacking kit is likely available. - If the manufacturer doesn’t supply a kit for your exact models, look for a universal stacking kit that explicitly lists compatibility with your dimensions and weight ratings. 2) Prepare the location and tools - Tools: socket set, screwdriver, level, tape measure, adjustable wrench, utility knife, gloves, helper (two people recommended). - Clear floor around the machines and make sure the floor is level and strong enough to support the stacked appliances. - Confirm dryer vent routing and required clearances. Also confirm the dryer’s fuel type (electric 3‑ or 4‑prong; or gas) and that hookups are accessible. 3) Install anti‑vibration and leveling - Before stacking, level the washer using its adjustable feet. Use a spirit level front‑to‑back and side‑to‑side. Tighten the lock nuts on the feet. - Place anti‑vibration pads under washer feet if floor is uneven or prone to vibration. 4) Dry run fit and align the kit - With both machines unplugged (and gas turned off, if gas), remove any packaging and lay out the stacking kit per instructions. Many kits have brackets that bolt to the washer top and a platform or brackets for the dryer. - With a helper, lift the dryer onto the washer slowly and set it in the kit to check alignment. Don’t bolt permanently yet. 5) Secure the stack per manufacturer instructions - Bolt or clip the kit components to the washer and dryer as directed. Tighten fasteners securely but don’t overtighten plastic parts. - For universal kits, follow the included template to mark and drill any required holes carefully. Ensure the dryer’s weight is fully supported by the kit — not only by the dryer door or rear panel. 6) Reconnect utilities and finish checks - Reconnect electrical cords. If converting a 3‑prong dryer to 4‑prong, follow local code and manufacturer instructions (or hire an electrician). For gas dryers, reattach the flex gas line and check for leaks with soapy water. - Reconnect the dryer vent, check the route for kinks, and secure clamps. Use smooth 4‑inch metal ducting where possible. - Run a spin cycle on the washer and a test dry on the dryer. Watch for movement, unusual noises, or excessive vibration. 7) Troubleshoot common problems (quick fixes) - Excessive movement or wobble: re‑level the washer, check that anti‑vibration pads are in place, tighten stacking‑kit fasteners, and ensure both machines are centered on the floor. - Rattling or banging: inspect for loose screws, items trapped between machines, or shipping bolts left in the dryer drum (some dryers ship with transit bolts). - Poor drying/no heat: verify vent is not kinked or clogged with lint after stacking and that the dryer has correct power/gas supply. - Circuit trips or electrical smell: unplug immediately and have an electrician inspect wiring and connections. Safety note: Always disconnect electrical power before moving or attaching the dryer. If the dryer uses gas, shut off the gas supply and check for leaks after reinstallation. If you’re not comfortable working with gas connections or high‑voltage electrical work, hire a qualified technician.
Common Symptoms
Wobbling/rocking during spin, loud banging or rattle after stacking, dryer not heating effectively (due to kinked/clogged vent), excessive lint buildup behind dryer, or unstable stack.
Common Causes
- Incorrect or missing stacking kit (or using an incompatible model kit)
- Washer not properly leveled or floor not stable
- Poor venting or improperly reconnected vent hose after stacking
Popular Parts That Fix This Problem
These are the most common replacement parts that fix this problem. When you're ready to order, click below to find the right part at ProsourceParts.com — just search by your appliance model number for a guaranteed fit.

Helpful Repair Tip
To confirm compatibility before buying a stacking kit: record both appliance model numbers (usually inside the washer door and on the dryer's back panel) and search the manufacturer’s site for a matching stacking kit — do not rely on cabinet width alone.
Frequently Asked Questions
Can I stack any washer and dryer?
Not always. Only front‑load washers are designed to support a dryer stacked on top, and many manufacturers require a model‑specific stacking kit. Check both machine model numbers and the manufacturer’s compatibility list before attempting to stack.
Do I need a professional to stack my washer and dryer?
If you’re comfortable following instructions, have a helper, and are only doing mechanical assembly, you can often install a stacking kit yourself. Hire a pro if you need gas line work, electrical conversion (3‑prong to 4‑prong), or the appliances are heavy and awkward to lift safely.
Related How-To Videos
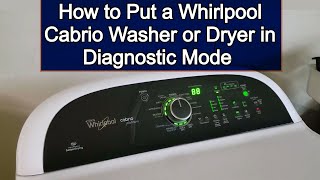

Real DIY Repair Stories
Be the first to share your repair story!
Share Your Repair Story
Your experience helps other homeowners fix their appliances. Tell us how it went!
Can't Fix It Yourself? Find a Local Technician
It's perfectly okay to call a professional. Some repairs require specialized tools, deep teardowns, or dealing with complex systems that are better left to the pros.

Find the Right Part for Your Appliance
Don't guess — search your exact appliance model number at ProsourceParts.com to find the correct OEM compatible replacement part. They offer fast free shipping, guaranteed fit, and thousands of parts in stock.
Your Free Parts Videos
Whether your dishwasher won't drain, your dryer stopped heating, or your fridge isn't cold, we've created simple repair guides for the most common appliance problems homeowners face. Each guide explains what's going wrong, the most likely causes, and which replacement parts fix the issue. When you're ready to order, we link directly to ProsourceParts.com where you can search by model number and get the right part shipped fast.