
Samsung WDF770SAF0 Dishwasher Troubleshooting – What to Check and How to Fix It
Need the replacement part? Search your model number at for guaranteed fit and fast free shipping.
Understanding the Problem
The Samsung WDF770SAF0 is a common 24" built-in dishwasher. Typical service calls include: won't start, won't fill, won't drain, leaks, loud noise during cycle, and dishes not getting clean. Below are likely causes and step-by-step diagnostics and repair instructions you can follow. 1) General preparation (do this before any diagnosis) - Turn off power to the dishwasher at the circuit breaker. Do not rely only on the door switch. - Turn off the water supply to the dishwasher at the shutoff valve under the sink. - Remove the toe kick / access panel to access wiring and plumbing if needed. - Note model and serial from the sticker inside the door for parts compatibility. 2) Dishwasher won't start or won't respond Likely parts to check first: door latch/switch, control board, user interface, thermal fuse. Step-by-step: 1. Check for error codes on the display and note them. 2. Verify power: use a multimeter at the junction box to confirm 120VAC is present with the breaker on. 3. Inspect the door latch and strike. If the door doesn’t latch firmly, the machine will not start. Replace latch if physically broken. 4. Test the door switch/latch with a multimeter for continuity when door is closed. Replace if open when it should be closed. 5. If the door and power are OK, try a hard reset: cut breaker power for 60 seconds, restore and attempt a cycle. 6. If no response and power is confirmed, the main control board or user interface may be defective — look for burnt components or swollen capacitors and replace the control board. 3) Dishwasher won’t fill with water Likely parts: water inlet valve, float assembly/float switch, water supply, control board. Step-by-step: 1. Confirm water supply to the house and that the shutoff under the sink is open. 2. Check the water inlet hose for kinks or blockage. 3. Remove the toe kick, start a cycle and listen for the inlet valve clicking/opening. If silent, test the valve solenoid for 120VAC when the machine calls for water. 4. With power off, disconnect the inlet valve and test solenoid coil continuity with an ohmmeter — low/zero or infinite resistance indicates a bad valve. 5. Inspect and clean the inlet valve inlet screen or replace the valve if clogged or failing. 6. Check the float and float switch in the base: debris can trap the float and prevent fill. Clean the float well and test the float switch for continuity. 4) Dishwasher won’t drain or shows water at bottom Likely parts: drain pump, drain hose, air gap, garbage disposal knockout, drain solenoid or control board. Step-by-step: 1. Check the drain hose for kinks or clogging. Remove and run water through it. 2. Check the sink air gap (if present) and garbage disposal knockout (if recently installed) for blockages. 3. Remove the lower kick plate and run a drain cycle. Listen for the drain pump motor running. If you don’t hear it, test for 120VAC at the pump when draining. 4. If power is present but pump doesn’t run, replace the drain pump. If pump runs but doesn’t move water, remove and inspect impeller for debris or damage and replace pump if required. 5. If pump intermittently runs, check wiring to pump and control board connections. 5) Leaking dishwasher Likely parts: door gasket, door latch/hinge, tub-to-door seal, water inlet valve, drain hose connections. Step-by-step: 1. Run a short test cycle and watch for where water appears (front, under, back). Use towels to narrow leak area. 2. Front door leak: inspect door gasket for cuts or flattening. Remove and replace gasket if damaged. 3. Check door hinges and springs — if the door isn’t closing evenly it can leak. Replace hinge assemblies if warped or broken. 4. Bottom leak: inspect pump seals and hose clamps at the pump and drain hose. Tighten clamps or replace cracked hoses. 5. Back leak: inspect inlet valve and supply hose for drips. Replace the inlet valve or hose if leaking. 6) Dishes not clean / spray arms not spinning Likely parts: clogged spray arms, circulation pump, filter assembly, detergent dispenser, water pressure. Step-by-step: 1. Remove and inspect filters and lower sump area; clean food build-up and debris. 2. Remove and inspect spray arms for blockages in the nozzles. Clean or soak in vinegar to dissolve deposits. 3. Start a cycle and confirm spray arm rotation. If they don’t turn, check for obstructions on the rotor or failed circulation pump. 4. Test circulation pump for humming or running. If it’s humming and not pumping, the impeller may be broken or jammed — remove debris or replace pump assembly. 5. Confirm detergent dispenser opens during cycle. If not, test dispenser motor/solenoid. 7) Loud noise during cycle Likely parts: wash motor/circulation pump, drain pump, loose spray arm, foreign object in sump. Step-by-step: 1. Remove lower rack and check the sump/pump area for broken glass, bones, or utensils stuck in the impeller. 2. Run a drain or wash and listen to localize the noise. If noise is from pump housing, replace the pump. 3. If clicking or rattling comes from spray arm, ensure it’s seated and not hitting racks. 8) Not drying dishes (if model uses a heating element) Likely parts: heating element, thermostat/thermistor, drying fan (if equipped), rinse aid system. Step-by-step: 1. Confirm rinse aid reservoir has fluid and that a heated dry option is selected. 2. Inspect the heating element (if visible) for visible breaks and test for continuity with an ohmmeter. 3. If no continuity or open, replace the heating element. If element OK, check thermostat/thermistor and control board signals. Final safety note: Always disconnect power at the breaker and shut off the water supply before servicing. Use a multimeter only if you know how to test safely. If you are not comfortable working with mains voltage or cannot isolate the fault after these tests, call a qualified appliance technician.
Common Symptoms
Dishwasher won’t start, won’t fill, won’t drain, leaks, loud noises during wash, poor cleaning or no drying.
Common Causes
- Faulty door latch or door switch preventing the cycle from starting
- Clogged or failed water inlet valve or blocked water supply
- Blocked drain, failed drain pump, or kinked drain hose
- Worn door gasket or damaged hinges causing leaks
- Failed circulation pump or clogged spray arms causing poor cleaning
- Failed heating element or thermostat causing poor drying
Popular Parts That Fix This Problem
These are the most common replacement parts that fix this problem. When you're ready to order, click below to find the right part at ProsourceParts.com — just search by your appliance model number for a guaranteed fit.

Helpful Repair Tip
Start by running a diagnostic/service cycle and note any error codes. Then check the door latch, float assembly, and inlet valve — these three are the most common single-point failures on this model.
Frequently Asked Questions
How do I read Samsung dishwasher error codes on the WDF770SAF0?
The display will show fault codes (for example 4C for water inlet/fill issues). First, note the exact code. Then consult the Samsung service manual or the error code list for your model — common codes point to inlet valve (4C), drain issues (5C or 5E), or temperature/thermostat problems. Run a service/diagnostic cycle to reproduce the error and follow targeted tests (check inlet valve for 120VAC and continuity for 4C, check drain pump and hoses for 5C).
Can I replace the drain pump or water inlet valve myself?
Yes, if you are comfortable turning off power at the breaker, shutting off the water supply, and using basic hand tools. Replace the component with a model-compatible part and restore connections exactly. Test operation after replacement. If you’re not experienced with electrical testing or the repair requires removing the tub or access to sealed electrical components, consider hiring a qualified technician.
Related How-To Videos


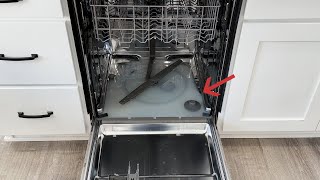
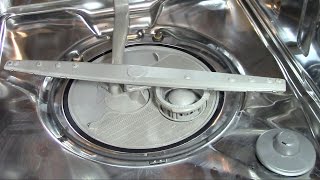
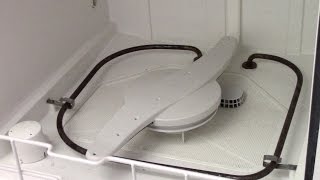

Real DIY Repair Stories
Be the first to share your repair story!
Share Your Repair Story
Your experience helps other homeowners fix their appliances. Tell us how it went!
Can't Fix It Yourself? Find a Local Technician
It's perfectly okay to call a professional. Some repairs require specialized tools, deep teardowns, or dealing with complex systems that are better left to the pros.

Find the Right Part for Your Appliance
Don't guess — search your exact appliance model number at ProsourceParts.com to find the correct OEM compatible replacement part. They offer fast free shipping, guaranteed fit, and thousands of parts in stock.
Your Free Parts Videos
Whether your dishwasher won't drain, your dryer stopped heating, or your fridge isn't cold, we've created simple repair guides for the most common appliance problems homeowners face. Each guide explains what's going wrong, the most likely causes, and which replacement parts fix the issue. When you're ready to order, we link directly to ProsourceParts.com where you can search by model number and get the right part shipped fast.