
Samsung Oven Temperature Sensor (NE63T8511SS) – What Part Fixes This Problem?
Need the replacement part? Search your model number at for guaranteed fit and fast free shipping.
Understanding the Problem
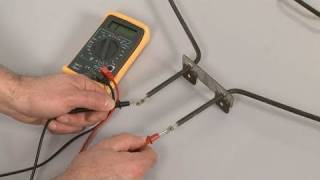
What the temperature sensor does The oven temperature sensor (sometimes called the oven thermostat sensor or NTC thermistor) measures the internal oven temperature and sends that signal to the oven control board so it can maintain correct baking/roasting temperatures. Common repair/diagnostic steps 1) Confirm the symptom: note if oven overheats, underheats, shows incorrect temperature, cycles too often, or displays an oven temperature error code. These point to a sensor or control fault. 2) Visual inspection: remove the oven racks and inspect the sensor (a thin metal probe projecting from the rear interior wall). Look for kinks, breaks in the probe or wiring, burned or melted insulation, or loose connector at the control board. 3) Multimeter resistance test: with the oven completely powered off and unplugged, disconnect the sensor wiring harness and measure resistance across the two sensor terminals. A working NTC thermistor will show a stable resistance value that changes with temperature (see Helpful Tip below for typical values). If it shows open (OL) or a wildly out-of-range value, the sensor is bad. 4) Live temperature verification (optional, advanced): with a second calibrated thermometer in the oven, run the oven to a set temperature and compare oven display reading vs actual. Large consistent offsets can be the sensor or a miscalibrated control. 5) Check wiring and connector: if sensor resistance is good but readings are wrong, inspect the harness and connector continuity back to the control board. Repair broken wires or corroded terminals. 6) Swap test (if available): if you have a known-good sensor from an identical model, swap to confirm the control board is fine. How to replace the sensor (practical step-by-step) 1) Safety first: turn off power to the oven at the breaker and verify power is off. For hardwired ovens, shut off the circuit breaker; for plug-in, unplug the unit. 2) Remove oven racks to give working room. 3) Open the oven door fully and locate the sensor — usually a small metal probe near the back wall held with 1–2 screws and attached to a two-pin connector. 4) Remove the screws holding the sensor to the back wall and gently pull the sensor forward to access the wiring plug. 5) Disconnect the sensor harness by pressing the tab and pulling the connector apart. 6) Remove the old sensor and compare it to the replacement to verify connector type and probe length. 7) Install the new sensor: plug the connector in, seat the sensor into the back wall, and tighten the screws snugly (do not overtighten). Reinstall racks. 8) Restore power to the oven and run a quick test: preheat to 350°F and observe whether the oven reaches and holds temperature. Optionally use a separate oven thermometer to verify accuracy. 9) If oven still shows incorrect temperature or error codes after replacement, recheck wiring continuity to the control board; a failing control board or incorrect calibration may be the cause. Safety note: Always disconnect electrical power before accessing internal oven components. If you are uncomfortable working with mains electricity or accessing the control board wiring, hire a qualified appliance technician.
Common Symptoms
Oven runs too hot or too cool, inconsistent temperature hold, long preheat times, oven temperature error codes, or the displayed temperature differs significantly from an independent oven thermometer.
Common Causes
- Failed oven temperature sensor (open circuit or wrong resistance)
- Damaged wiring or corroded connector between sensor and control board
- Faulty oven control board (less common after sensor checks)
Popular Parts That Fix This Problem
These are the most common replacement parts that fix this problem. When you're ready to order, click below to find the right part at ProsourceParts.com — just search by your appliance model number for a guaranteed fit.

Helpful Repair Tip
Use a digital multimeter to measure resistance across the sensor: a good NTC oven sensor will show a consistent resistance at room temperature (common values around ~1.1 kΩ at 25°C for many Samsung sensors). Resistance should change smoothly when you warm the probe (e.g., with a hair dryer). Open (OL) or no change = bad sensor.
Frequently Asked Questions
How do I test the oven temperature sensor on my Samsung NE63T8511SS?
Power off the oven, unplug the sensor harness and measure resistance across the two sensor terminals with a multimeter. At room temperature the reading should be within the expected range for the sensor (many Samsung NTC sensors read around ~1.0–1.2 kΩ at 25°C). Then heat the probe (hot air or placing it in warm water briefly) — the resistance should decrease smoothly as temperature rises. Open circuit or no change indicates a bad sensor. If unsure, compare against a known-good sensor or consult the service manual for the exact resistance spec.
Can I replace the temperature sensor myself and how much will it cost?
Yes — replacing the sensor is one of the easier DIY oven repairs: turn off power, remove a couple screws, unplug and swap the sensor. Parts typically cost between $20–$60 depending on source and OEM vs aftermarket. If you’re not comfortable working around high-voltage wiring or the unit is hardwired into your home, consider hiring a licensed appliance technician.
Related How-To Videos

Real DIY Repair Stories
Be the first to share your repair story!
Share Your Repair Story
Your experience helps other homeowners fix their appliances. Tell us how it went!
Can't Fix It Yourself? Find a Local Technician
It's perfectly okay to call a professional. Some repairs require specialized tools, deep teardowns, or dealing with complex systems that are better left to the pros.

Find the Right Part for Your Appliance
Don't guess — search your exact appliance model number at ProsourceParts.com to find the correct OEM compatible replacement part. They offer fast free shipping, guaranteed fit, and thousands of parts in stock.
Your Free Parts Videos
Whether your dishwasher won't drain, your dryer stopped heating, or your fridge isn't cold, we've created simple repair guides for the most common appliance problems homeowners face. Each guide explains what's going wrong, the most likely causes, and which replacement parts fix the issue. When you're ready to order, we link directly to ProsourceParts.com where you can search by model number and get the right part shipped fast.