
Replacing the Slider on MVWB865GW0 – Identify, Remove, and Replace the Broken Slider
Need the replacement part? Search your model number at for guaranteed fit and fast free shipping.
Understanding the Problem
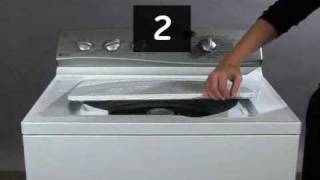
Many top-load washers on the MVWB865 series use small plastic slider components in a few locations: the fabric softener/dispenser slider, the small internal slides in the agitator/agitator-cam assembly (directional cogs), or occasionally a control/console slider on certain trim packages. When one of these plastic sliders cracks, jams or wears away the washer may fail to dispense softener, make unusual noises, jam in agitation/spin, or show a stuck control element. Before you buy parts or disassemble anything, identify which slider you mean by the symptom and location. A dispenser slider failure is visible at the center of the agitator or at the dispenser cup and typically causes the softener not to release or to leak. An agitator cam/slider problem usually produces grinding, a loss of directional agitation or inability to agitate/spin properly. Console/control sliders will be evident if the control action is physically sticky or non-responsive.
Common Symptoms
Softener not dispensing or leaking, plastic visible cracking in dispenser or agitator, loud grinding or rough agitation, agitator not moving in one direction, or a sticky/non-responsive control slider.
Common Causes
- Plastic wear and embrittlement from age and repeated use (common in dispenser sliders and agitator cogs).
- Chemical attack from concentrated detergent or fabric softener buildup causing parts to crack or stick.
- Physical damage from improper disassembly, forceful loads, or foreign objects jammed into the dispenser/agitator area.
Popular Parts That Fix This Problem
These are the most common replacement parts that fix this problem. When you're ready to order, click below to find the right part at ProsourceParts.com — just search by your appliance model number for a guaranteed fit.

Helpful Repair Tip
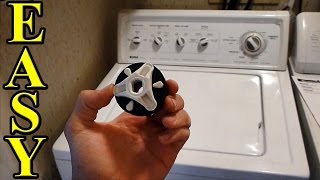
Remove the center cap or dispenser cup and compare the broken piece to photos on an OEM parts diagram (Maytag/Whirlpool parts lookup) to confirm the exact slider before ordering. Bring the broken piece to the parts counter or photograph it for accurate matching.
Frequently Asked Questions
How do I know which slider on MVWB865GW0 is broken?
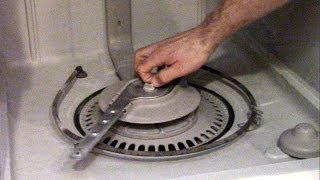
Check where you see the symptom. If softener leaks or doesn't dispense, remove the center dispenser/agitator cap and inspect the dispenser slider or cup. If the washer grinds or fails to change direction, remove the agitator (bolt under the cap) and inspect the agitator cam/directional cogs (small plastic 'dogs' or slider). If a control feels sticky, examine the console control area. Photograph the broken piece and compare it to the parts diagram for your exact model number to confirm.
Can I replace the slider myself and how long will it take?
Yes—most slider replacements are a straightforward DIY job if you have basic tools and disconnect power first. Replacing a fabric softener/dispenser slider is usually 10–30 minutes: remove the cap/cup, swap the part and reassemble. Replacing agitator cogs requires removing the center cap, unscrewing the agitator retaining bolt, pulling the agitator, swapping the cam/dogs and reassembling—plan 30–60 minutes. Console or control slider work may take longer and can involve removing the console. If you are unsure, take photos during disassembly or consult a parts diagram; when in doubt, call a technician.
Related How-To Videos

Real DIY Repair Stories
Be the first to share your repair story!
Share Your Repair Story
Your experience helps other homeowners fix their appliances. Tell us how it went!
Can't Fix It Yourself? Find a Local Technician
It's perfectly okay to call a professional. Some repairs require specialized tools, deep teardowns, or dealing with complex systems that are better left to the pros.

Find the Right Part for Your Appliance
Don't guess — search your exact appliance model number at ProsourceParts.com to find the correct OEM compatible replacement part. They offer fast free shipping, guaranteed fit, and thousands of parts in stock.
Your Free Parts Videos
Whether your dishwasher won't drain, your dryer stopped heating, or your fridge isn't cold, we've created simple repair guides for the most common appliance problems homeowners face. Each guide explains what's going wrong, the most likely causes, and which replacement parts fix the issue. When you're ready to order, we link directly to ProsourceParts.com where you can search by model number and get the right part shipped fast.