
Range Burner Head Ignitor (MGR5751BDS18) – What Part Fixes This Problem?
Need the replacement part? Search your model number at for guaranteed fit and fast free shipping.
Understanding the Problem
Brief explanation: The "burner head ignitor" on a gas range can mean two related components: the surface burner spark electrode (the small metal probe that creates spark at the burner head) and the oven bake ignitor (a glow bar that lights the oven burner). Both fail in different ways but produce similar symptoms: burners that won't light or intermittent ignition. This guide covers how to identify which ignitor is bad and how to replace it. Step-by-step diagnostic and repair steps: 1) Identify which ignitor is failing: surface burners use a spark electrode at each burner head; the oven uses a glow ignitor near the bake burner. If only one cooktop burner won't spark, it's a surface electrode issue; if the oven won't light (or takes a long time), it's likely the oven ignitor. 2) Visual inspection: turn off power and gas. Remove grates and burner caps. For surface ignitors look for cracked, broken, or carbon-fouled electrodes and loose wires. For oven ignitor look for a cracked or blackened glow bar or no glow when the oven is calling for heat. 3) Confirm with tests: - Surface spark electrode: plug cooker back in, set a burner to light and listen/observe for spark. If no spark at that electrode but other burners spark, suspect electrode or wiring/switch. Use a continuity meter to check the electrode wiring to the spark module and test the spark module if possible. - Oven glow ignitor: with oven power on and set to Bake, watch the ignitor – it should glow bright orange within 30–90 seconds. If it does not glow or glows weakly and won't open the gas valve, the ignitor is bad. A full electrical test uses an ammeter (bake ignitors draw ~2–5 amps depending on design); some are tested with resistance (many glow ignitors have continuity but may still be weak; current draw test is best). 4) Check related parts: intermittent ignition can be caused by cracked electrode, damaged wiring, faulty spark module/ignition switch, clogged burner ports, or a bad safety gas valve (rare if other burners light normally). 5) Order the correct replacement: do not rely only on a generic picture—match the part to your exact model (MGR5751BDS18). Common replacement parts include surface electrode/spark kit, burner head/cap (if damaged), and oven bake ignitor (glow bar). 6) Replace the part (general repair steps): - Tools: Philips and flat screwdrivers, nut drivers, socket set, multimeter, needle-nose pliers, work gloves. - Safety: shut off gas at the supply valve and turn off power at the breaker. Verify power is off at the range. - Surface electrode replacement: remove grates and burner caps. Unscrew retaining screws on the burner head assembly and lift off. Disconnect the small wire connector to the electrode or remove mounting screw(s) and pull electrode out. Replace with new electrode, reconnect wiring, reassemble burner head and cap, replace grate. Turn power/gas on and test. - Oven ignitor (glow bar) replacement: disconnect power and gas. Remove the oven racks and access the bottom panel or rear panel as required. Unscrew the mounting bracket for the ignitor, carefully pull the ignitor free and disconnect the two-wire connector (it may be behind an access panel). Install the new ignitor by reversing removal steps—do not overtighten the fragile ceramic base. Reassemble panels and restore power/gas. Test oven by selecting Bake and observing the ignitor glow and burner light. 7) Final test: after replacing, test each burner and the oven through a full cycle. Check for proper flame shape (steady blue flame at cooktop, steady ignition for oven) and no gas smell. If problems persist, suspect ignition module, wiring harness, or gas valve—these need further diagnosis. Safety note: you are working with an appliance that involves open gas and live electricity. Always shut off the gas supply and power before disassembly. If you smell gas or are uncomfortable working with gas components, stop and call a licensed technician.
Common Symptoms
One cooktop burner doesn't spark or lights intermittently; oven takes long to ignite or never lights; visible cracked or blackened ignitor or no glow from oven ignitor.
Common Causes
- Cracked, fouled, or physically damaged spark electrode or oven glow ignitor
- Damaged wiring or loose connector between ignitor and ignition module
- Faulty ignition module, bake safety valve, or clogged burner ports
Popular Parts That Fix This Problem
These are the most common replacement parts that fix this problem. When you're ready to order, click below to find the right part at ProsourceParts.com — just search by your appliance model number for a guaranteed fit.

Helpful Repair Tip
Use a multimeter to check continuity on surface electrodes and measure current draw on an oven glow ignitor (weak or low current indicates a bad ignitor). Also swap a known-good electrode (or burner cap) from another position to isolate the issue quickly.
Frequently Asked Questions
Can I replace the ignitor myself?
Yes, many homeowners can replace a surface electrode or oven glow ignitor with basic tools and by following safety steps: shut off power and gas, remove panels or burner parts, disconnect the old ignitor, and install the new one. However, if you smell gas, are unsure about working with gas lines or electrical components, or the problem involves the gas valve or ignition module, call a licensed technician.
How much does a replacement ignitor cost and how long will the repair take?
Typical parts cost: $15–$60 for a surface electrode, $30–$120 for an oven glow ignitor (OEM prices vary). Labor for a DIY replacement is usually 20–60 minutes. If you hire a pro, expect higher labor costs (often 1–2 hours of service time). Always confirm the correct OEM part for your model MGR5751BDS18 before buying.
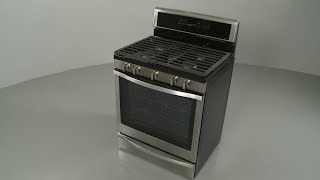
Related How-To Videos
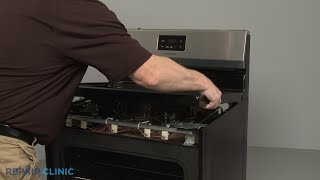

Real DIY Repair Stories
Be the first to share your repair story!
Share Your Repair Story
Your experience helps other homeowners fix their appliances. Tell us how it went!
Can't Fix It Yourself? Find a Local Technician
It's perfectly okay to call a professional. Some repairs require specialized tools, deep teardowns, or dealing with complex systems that are better left to the pros.

Find the Right Part for Your Appliance
Don't guess — search your exact appliance model number at ProsourceParts.com to find the correct OEM compatible replacement part. They offer fast free shipping, guaranteed fit, and thousands of parts in stock.
Your Free Parts Videos
Whether your dishwasher won't drain, your dryer stopped heating, or your fridge isn't cold, we've created simple repair guides for the most common appliance problems homeowners face. Each guide explains what's going wrong, the most likely causes, and which replacement parts fix the issue. When you're ready to order, we link directly to ProsourceParts.com where you can search by model number and get the right part shipped fast.