
PDW1860NSS Dishwasher – Troubleshooting, Common Failures and How to Fix Them
Need the replacement part? Search your model number at for guaranteed fit and fast free shipping.
Understanding the Problem
Brief overview: PDW1860NSS is a built-in/portable dishwasher model designation; most problems fall into a few common categories: won't start, won't fill, won't drain, leaks, poor cleaning, noisy operation, or won't dry. Below are step-by-step diagnostics and practical fixes for each common failure. 1) Dishwasher won't start or won't run: 1.1 Check power: make sure the unit is plugged in, the circuit breaker/fuse hasn't tripped, and the door is fully latched. Use a multimeter to confirm 120VAC at the dishwasher outlet. 1.2 Inspect the door latch and switches: Open the door and check that the latch engages. If the door latch/micro switch is faulty the dishwasher won't start — remove the inner door panel (after powering off) and test the switch for continuity with a multimeter. Replace the latch assembly if no continuity when latched. 1.3 Control/buttons: If lights are unresponsive but power is present, the user interface or control board may have failed. Try doing a control reset (power off at breaker for 60 seconds). If still dead, test for voltage into the control board; replace the board if it's not sending power to components. 2) Dishwasher won't fill or low water: 2.1 Check inlet water supply and valve: Ensure the kitchen water shutoff to the dishwasher is open. Remove the inlet hose and test water flow. 2.2 Test the water inlet valve solenoid: With power off, disconnect the valve and check the solenoid coil for continuity. If the valve does not open when the cycle calls for water (use a short diagnostic cycle and listen for a click), replace the inlet valve. 2.3 Float switch: Check the float assembly in the tub area for free movement and the float switch continuity. A stuck float may prevent filling. 3) Dishwasher won't drain or shows standing water: 3.1 Check the filter and sump: Remove lower rack, clean the filter basket and check for debris in the sump. 3.2 Inspect the drain hose and air gap: Make sure the drain hose is not kinked and the air gap (if present) is clear. 3.3 Test the drain pump: During a drain cycle, listen for pump operation. If the pump is silent or hums but doesn't evacuate water, remove the pump assembly and inspect for debris or damage. Check pump motor for continuity; replace pump if motor fails or impeller is broken. 3.4 Check the drain solenoid/valve (if equipped) and the control board for voltage to the pump during drain. 4) Leaks (under unit or door): 4.1 Inspect door gasket: Open the door and inspect the rubber door gasket for cracks, deformation or food buildup. Clean or replace the gasket as needed. 4.2 Check door latch alignment and strike: A misaligned door can prevent a proper seal. Adjust hinge or latch and test. 4.3 Inspect hose connections: Turn off water and check all inlet, drain and internal hose clamps for tightness and cracks. Replace damaged hoses/clamps. 4.4 Check tub for cracks and the sump area for a split: If the tub is cracked, tub repair or replacement is needed. 5) Poor cleaning / dishes come out dirty: 5.1 Inspect spray arms: Remove and clean spray arms, clear clogged holes with a small wire. 5.2 Check circulation pump and filter: If spray pressure is low, the circulation pump or motor coupling may be failing. Remove and inspect sump, impeller and pump. Replace faulty pump or coupling. 5.3 Use proper detergent and run hot water: Ensure household water heater is set to 120°F (approx 49°C) and run hot water at the sink before starting. 6) Noisy operation: 6.1 Identify noise source: Rattling may be a loose utensil or rack wheel; grinding or loud hum can indicate a failing pump motor or blocked impeller. 6.2 Remove and inspect pump and motor bearings: If bearings are worn or impeller contacts housing, replace pump/motor assembly. 7) Not drying: 7.1 Check rinse aid level and dispenser: Add rinse aid and check dispenser function. 7.2 Test heating element (if equipped): With the cycle set to dry and power off, test the heating element for continuity. Replace element if open. 8) Control error codes: If the model displays error codes, consult the PDW1860NSS manual for code definitions. Common codes relate to water inlet, drain, float switch, or temperature sensors—test the corresponding components. Practical repair steps (summary): - Always disconnect power at the breaker before servicing. - Start with the easy checks: power, door latch, filters, hoses, and visible leaks. - Use a multimeter to test continuity and voltage on switches, motors and heating elements. - Remove and clean filters and spray arms before replacing major components. - Replace only the failed assemblies (inlet valve, drain pump, circulation pump, door latch, heating element, control board). Safety note: Always unplug the dishwasher or turn off its circuit breaker before opening panels or testing electrical components. Use insulated tools and verify power is off with a meter. If you are not comfortable working with mains electricity or removing the tub/pump, hire a qualified appliance technician.
Common Symptoms
Won't start, won't fill, won't drain, leaks under dishwasher, poor cleaning performance, loud grinding or humming noises, and poor drying.
Common Causes
- Power, door latch or control board failure
- Clogged filters, spray arms, or blocked sump
- Failed inlet valve, drain pump, or circulation pump
- Damaged door gasket or loose hoses causing leaks
- Worn pump bearings or impeller damage causing noise
- Heating element or rinse aid dispenser malfunction causing poor drying
Popular Parts That Fix This Problem
These are the most common replacement parts that fix this problem. When you're ready to order, click below to find the right part at ProsourceParts.com — just search by your appliance model number for a guaranteed fit.

Helpful Repair Tip
Start with filters, spray arms and the lower sump — 70% of poor cleaning and drainage problems are debris-related. Listen during a drain cycle: if you hear no pump hum or the pump hums but doesn't move water, the drain pump is the likely culprit.
Frequently Asked Questions
How do I reset my PDW1860NSS dishwasher?
Most dishwashers are reset by disconnecting power: turn off the circuit breaker or unplug the unit for 60 seconds, then restore power. If the dishwasher has a dedicated reset or cancel button, hold it per the manual (often 3–10 seconds). If error codes persist after a reset, test the component related to the code (inlet valve, float switch, drain pump, etc.).
Can I replace the drain pump or inlet valve myself?
Yes — if you are comfortable with basic tools and safety. Steps: 1) Turn off power at the breaker and shut off water supply. 2) Pull dishwasher out and disconnect hoses and electrical connectors (take photos for reassembly). 3) Remove access panels to reach pump or valve. 4) Unclip and remove the failed part, replace with the model-specific replacement, reattach connectors and hoses, and test for leaks and operation. If you encounter corroded connectors, unclear wiring, or complex multi-panel disassembly, consider hiring a technician.
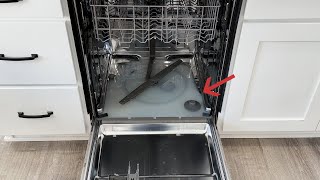
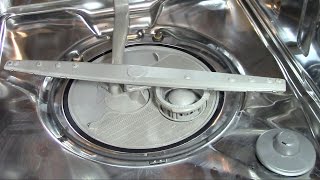
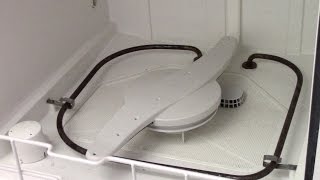
Related How-To Videos



Real DIY Repair Stories
Be the first to share your repair story!
Share Your Repair Story
Your experience helps other homeowners fix their appliances. Tell us how it went!
Can't Fix It Yourself? Find a Local Technician
It's perfectly okay to call a professional. Some repairs require specialized tools, deep teardowns, or dealing with complex systems that are better left to the pros.

Find the Right Part for Your Appliance
Don't guess — search your exact appliance model number at ProsourceParts.com to find the correct OEM compatible replacement part. They offer fast free shipping, guaranteed fit, and thousands of parts in stock.
Your Free Parts Videos
Whether your dishwasher won't drain, your dryer stopped heating, or your fridge isn't cold, we've created simple repair guides for the most common appliance problems homeowners face. Each guide explains what's going wrong, the most likely causes, and which replacement parts fix the issue. When you're ready to order, we link directly to ProsourceParts.com where you can search by model number and get the right part shipped fast.