
NTW4516FW3 Washer — Common Problems, Diagnostics & How to Fix Them
Need the replacement part? Search your model number at for guaranteed fit and fast free shipping.
Understanding the Problem
The NTW4516FW3 is a top-load residential washer that commonly shows a handful of repeatable faults after years of use: won't start, won't fill, won't drain or spin, or loud banging/vibration during cycles. Below are the most likely causes for each symptom and step-by-step diagnostic and repair instructions you can follow. 1) Washer won't start or show any power 1.1 Symptoms: no lights, no response to control buttons. 1.2 What to check first: household circuit breaker, power cord, door/lid switch, control board and wiring. 1.3 Steps: a) Confirm outlet power — plug in a lamp or use a multimeter. If no power, reset breaker or call an electrician. b) Unplug the washer. Inspect the power cord for burn marks and test continuity with a multimeter. c) Access the lid switch (usually under the top panel by removing two screws at the back and lifting the top). With the lid closed, test the lid switch for continuity. Replace if open when closed. d) If lid switch good, check for visible burn/damage on control board or fuses. If a control fuse is blown, the board may be at fault. 2) Washer won't fill or fills slowly 2.1 Symptoms: little or no water entering the tub, cycle times extended. 2.2 What to check first: water supply valves, inlet hoses and screens, water inlet valve assembly, water pressure. 2.3 Steps: a) Confirm both hot and cold water valves at the wall are fully open. b) Unscrew inlet hoses at the washer (have a towel). Inspect and clean the small mesh screens in the valve inlet. Replace kinked hoses. c) With the machine off, remove the inlet hose and look for debris. A restricted inlet screen causes slow/no fill. d) If inlet screens are clean and valves are open, test the inlet valve solenoids: unplug washer, remove rear access panel, disconnect wire harness at the inlet valve and test each solenoid for continuity (should have measurable ohms). Replace the inlet valve assembly if open or leaking. 3) Washer won't drain or spins but water remains 3.1 Symptoms: water remains in tub after spin; error codes or long drain times. 3.2 What to check first: drain hose, standpipe/clog, pump, foreign object jam. 3.3 Steps: a) Check drain hose for kinks and ensure it's installed to correct height at standpipe (usually 30"–96" depending on model). Remove hose and blow through it to confirm flow. b) Inspect the laundry tub and pump area for coins, small items, or lint blocking the pump impeller. Many pumps have an access panel or require removing the cabinet. c) Test the drain pump with a multimeter for continuity. If pump spins but won't move water, it's clogged or failed — replace the pump assembly. d) If drain pump tests fine, check wiring and timer or control board outputs to the pump during a drain cycle. 4) Washer doesn't agitate or spin properly 4.1 Symptoms: load soaked but drum does not agitate/spin; very slow agitation; loud grinding when attempting to spin. 4.2 What to check first: lid switch/interlock, drive components (belt/clutch/motor coupling or direct-drive motor), transmission, motor. 4.3 Steps: a) Confirm lid switch is working (see step 1). Many machines will not engage agitate or spin if the lid switch fails. b) With power off, remove access panels and visually inspect the drive system for broken belts, damaged motor couplings, or a seized transmission. Rotate the tub by hand to feel binding. c) Test the motor for continuity and check for burnt smell or overheating. If motor sings but won't spin under load, the motor coupling or transmission may be failed. d) Replace the worn coupling, belt, or clutch assembly per service manual instructions. 5) Excessive noise or vibration 5.1 Symptoms: loud rumbling, banging during spin, knocking. 5.2 What to check first: unbalanced load, suspension/shock absorbers, worn tub bearings, foreign objects in tub or pump. 5.3 Steps: a) First remove clothes and try a small balanced load to see if problem persists. Spread large items across the drum evenly. b) With the washer paused, press down on the tub and observe play — excessive wobble points to worn shocks or suspension springs. Replace shock absorbers/springs in pairs. c) If noise is grinding or rumbling that changes with spin speed, suspect worn bearings or a damaged tub — replace bearing/transmission assembly. 6) Error codes / diagnostics 6.1 Many models will blink lights to indicate drain (Sd), water fill (F8/IE), or lid (Ld) faults. Consult the owners manual for code meanings. 6.2 Use a basic diagnostics cycle (unplug for 60 seconds then plug in, or consult service manual to enter diagnostic mode) to run pump/motor/inlet tests. Basic replacement guidance (general steps common to most repairs): 1) Unplug the washer and shut off water supply. 2) Move washer away from wall and place on a stable surface. Have towels and a small bucket ready. 3) Remove the correct access panel (back, front, or top) as required — usually screws at rear/top. 4) Label and photograph wire harnesses before disconnecting. Disconnect and replace the faulty component. 5) Reassemble and test with a small load. Safety note: Always disconnect power and water before opening the washer. If at any stage you encounter high-voltage-looking damage, heavy corrosion, or you are not comfortable with electrical testing, stop and call a qualified appliance technician.
Common Symptoms
No power or won't start; slow or no fill; water remains after cycle; no agitation or spin; loud noises or vibration during spin.
Common Causes
- Faulty lid switch or control board preventing motor start
- Clogged inlet screens or failed water inlet valve
- Clogged or failed drain pump or blocked drain hose
Popular Parts That Fix This Problem
These are the most common replacement parts that fix this problem. When you're ready to order, click below to find the right part at ProsourceParts.com — just search by your appliance model number for a guaranteed fit.

Helpful Repair Tip
Before replacing parts, verify the component with a multimeter — lid switch and drain pump are inexpensive and quick to test; replacing them solves many 'won't start' or 'won't drain' issues.
Frequently Asked Questions
How do I reset the NTW4516FW3 washer?
To perform a basic reset: unplug the washer or switch off the house circuit for 60 seconds, then restore power. This clears simple control glitches. If the washer uses a diagnostic mode, consult your owner's manual for exact button sequences to enter diagnostics for component tests.
Can I replace parts on the NTW4516FW3 myself?
Yes — many repairs (lid switch, inlet valve, drain pump, shocks) are DIY-friendly if you have basic hand tools and follow safety steps: unplug power, shut off water, photograph wiring before disconnecting, and test parts with a multimeter. For complex jobs (transmission, tub bearings, control board), consider hiring a technician.
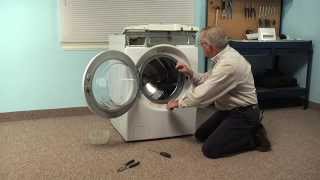
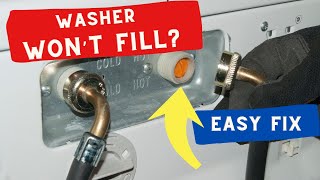
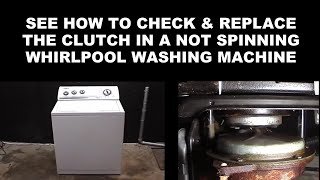
Related How-To Videos

Real DIY Repair Stories
Be the first to share your repair story!
Share Your Repair Story
Your experience helps other homeowners fix their appliances. Tell us how it went!
Can't Fix It Yourself? Find a Local Technician
It's perfectly okay to call a professional. Some repairs require specialized tools, deep teardowns, or dealing with complex systems that are better left to the pros.

Find the Right Part for Your Appliance
Don't guess — search your exact appliance model number at ProsourceParts.com to find the correct OEM compatible replacement part. They offer fast free shipping, guaranteed fit, and thousands of parts in stock.
Your Free Parts Videos
Whether your dishwasher won't drain, your dryer stopped heating, or your fridge isn't cold, we've created simple repair guides for the most common appliance problems homeowners face. Each guide explains what's going wrong, the most likely causes, and which replacement parts fix the issue. When you're ready to order, we link directly to ProsourceParts.com where you can search by model number and get the right part shipped fast.