
Maytag Neptune Dryer Drum Seals — Symptoms, Diagnosis & Replacement
Need the replacement part? Search your model number at for guaranteed fit and fast free shipping.
Understanding the Problem
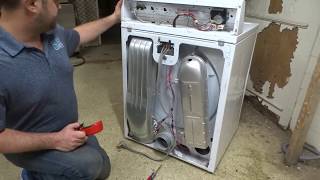
Drum seals (felt or rubber seals) on a Maytag Neptune dryer sit between the spinning drum and the front/rear bulkhead. Their job is to keep the drum centered, prevent metal-on-metal contact, and maintain airflow so the dryer heats and tumbles efficiently. Over time the felt compresses, the rubber hardens or the retaining clips break, allowing the drum to rub on the cabinet, produce squeaks or scraping, and leak air and lint into the cabinet. Left unchecked, damaged drum seals accelerate wear on the drum and bulkhead, allow lint to accumulate behind the drum (a fire risk), reduce heating efficiency, and create loud metal-on-metal noises. Diagnosis is straightforward with a visual inspection and a manual spin test, but proper replacement requires disassembling the dryer enough to remove the drum and fit new seals, and then correctly seating the drum to avoid further misalignment.
Common Symptoms
Loud scraping or squeaking during spin, visible wear or gaps in felt/rubber around drum edges, lint and dust behind the drum, reduced drying performance, and occasional burning or rubbing smell.
Common Causes
- Normal wear and compression of felt or rubber seals over many years of use
- Drum misalignment or worn rollers/bearings causing uneven contact and seal damage
- Excess lint buildup, overheating, or foreign objects that abrade and cut seals
Popular Parts That Fix This Problem
These are the most common replacement parts that fix this problem. When you're ready to order, click below to find the right part at ProsourceParts.com — just search by your appliance model number for a guaranteed fit.

Helpful Repair Tip
Unplug the dryer, open the door and manually roll the drum while observing the front and rear edges with a flashlight—look for gaps, torn felt, or metal rubbing marks. Press a piece of tissue into the seam; if it moves or tears easily the seal is worn.
Frequently Asked Questions
Can I replace Maytag Neptune dryer drum seals myself?
Yes, a competent DIYer can replace drum seals on many Maytag Neptune dryers, but it requires basic appliance disassembly: unplugging the unit, removing the top and front panel (or rear panel depending on model), sliding out the drum, removing old felt/rubber, cleaning the seating surface, and installing the new seals evenly before reassembling. Typical tools: nut drivers, Phillips screwdriver, flat pry tool, needle-nose pliers, and a flashlight. If you’re not comfortable working with heavy panels, springs or aligning the drum, hire a technician — improper installation can cause more damage.
How much does it cost to replace dryer drum seals on a Maytag Neptune?
Parts alone typically range from $20–$80 for seal kits depending on whether you buy individual felt pieces or a full kit that includes clips and gaskets. If rollers, bearings or other support parts are needed the parts cost increases. Labor for a professional repair typically adds $100–$250 depending on shop/region and how long the job takes. Always check and quote using your exact model number to get accurate pricing.
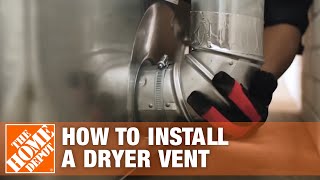
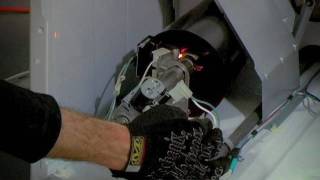
Related How-To Videos

Real DIY Repair Stories
Be the first to share your repair story!
Share Your Repair Story
Your experience helps other homeowners fix their appliances. Tell us how it went!
Can't Fix It Yourself? Find a Local Technician
It's perfectly okay to call a professional. Some repairs require specialized tools, deep teardowns, or dealing with complex systems that are better left to the pros.

Find the Right Part for Your Appliance
Don't guess — search your exact appliance model number at ProsourceParts.com to find the correct OEM compatible replacement part. They offer fast free shipping, guaranteed fit, and thousands of parts in stock.
Your Free Parts Videos
Whether your dishwasher won't drain, your dryer stopped heating, or your fridge isn't cold, we've created simple repair guides for the most common appliance problems homeowners face. Each guide explains what's going wrong, the most likely causes, and which replacement parts fix the issue. When you're ready to order, we link directly to ProsourceParts.com where you can search by model number and get the right part shipped fast.