
Maytag NEP Dryer Drum Seals Worn or Rubbing – How to Diagnose and What Part Fixes It
Need the replacement part? Search your model number at for guaranteed fit and fast free shipping.
Understanding the Problem
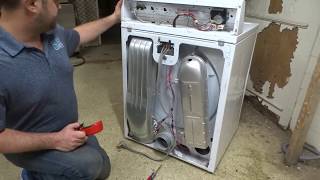
Drum seals (felt seals or fabric/felt gaskets) on Maytag NEP-series dryers keep the drum centered, prevent metal-on-metal contact, and reduce lint escaping into the cabinet. Over time seals compress, tear, or fall off, which causes rubbing noises, visible wear at the drum edges, excess lint buildup, and sometimes a burning or rubbing smell. If left unaddressed, worn seals can accelerate drum or bulkhead wear and cause more expensive repairs. Diagnosing worn drum seals is straightforward: inspect the front and rear felt seals for thinning, tears, or missing sections; spin the drum by hand and look for scraping or metal-to-metal contact; and check for lint trails or a gap between the drum edge and the bulkhead. Replacement usually involves a front and/or rear felt seal kit and may include drum slides or glides if they are worn as well.
Common Symptoms
Squeaking/rubbing noise during spin, visible torn or compressed felt seals at front/rear of drum, excessive lint around cabinet seams, burning/rubbed smell, and drum wobble or uneven movement.
Common Causes
- Normal wear and compression of felt seals over years of use
- Torn or detached seals from improper installation or foreign objects
- Worn drum glides or rollers causing the drum to shift and rub the seal
Popular Parts That Fix This Problem
These are the most common replacement parts that fix this problem. When you're ready to order, click below to find the right part at ProsourceParts.com — just search by your appliance model number for a guaranteed fit.

Helpful Repair Tip
Open the dryer door and spin the drum by hand while watching the gap between the drum edge and the cabinet—if the drum edge contacts metal or you see a visible torn or compressed felt, that seal needs replacing. Also look for metal wear marks on the drum edge.
Frequently Asked Questions
Do I need to replace both front and rear seals at the same time?
Not always, but it's best practice to inspect both. If one seal is worn, the other is often close behind. Replacing both front and rear seals together ensures even drum alignment and typically prevents repeat service shortly after a single-side replacement.
Can I install drum seals myself, and how long does it take?
Yes — replacing dryer felt seals is a common DIY job if you are comfortable removing the dryer front or rear panel and working with screws and clips. Typical time is 1–2 hours depending on access and whether you also replace glides or the rear bearing. Always unplug the dryer and take photos during disassembly to aid reassembly; consult a model-specific guide or video for your NEP model.
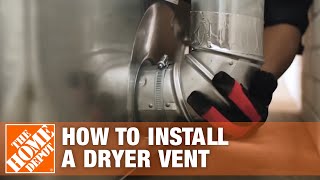
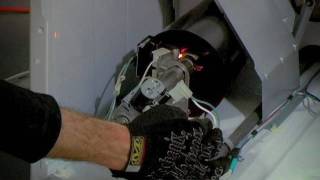
Related How-To Videos

Real DIY Repair Stories
Be the first to share your repair story!
Share Your Repair Story
Your experience helps other homeowners fix their appliances. Tell us how it went!
Can't Fix It Yourself? Find a Local Technician
It's perfectly okay to call a professional. Some repairs require specialized tools, deep teardowns, or dealing with complex systems that are better left to the pros.

Find the Right Part for Your Appliance
Don't guess — search your exact appliance model number at ProsourceParts.com to find the correct OEM compatible replacement part. They offer fast free shipping, guaranteed fit, and thousands of parts in stock.
Your Free Parts Videos
Whether your dishwasher won't drain, your dryer stopped heating, or your fridge isn't cold, we've created simple repair guides for the most common appliance problems homeowners face. Each guide explains what's going wrong, the most likely causes, and which replacement parts fix the issue. When you're ready to order, we link directly to ProsourceParts.com where you can search by model number and get the right part shipped fast.