
LG DLE1001W Troubleshooting Guide – Common Dryer Problems & Parts to Replace
Need the replacement part? Search your model number at for guaranteed fit and fast free shipping.
Understanding the Problem
The LG DLE1001W is a compact residential electric dryer that can show several common faults as it ages or if maintenance is neglected. The most frequent issues owners report are: the dryer runs but doesn't heat, the dryer won't start or stop mid-cycle, unusually long drying times, and excessive noise or vibration. Many of these problems are caused by a small number of replaceable components or routine maintenance items (clogged vent, lint buildup, worn drum rollers, failed thermostats, or thermal fuses). Diagnosing the DLE1001W starts with observing symptoms, checking error codes or lights, and measuring simple things (power to the unit, continuity of thermal parts, and airflow). Some fixes are straightforward and safe for a confident DIYer (cleaning the lint trap and vent, replacing a thermal fuse), while others require electrical testing and mechanical disassembly. Always unplug the dryer before doing internal checks or parts replacement and refer to the model/serial tag for exact replacement part numbers.
Common Symptoms
No heat or weak heat; dryer runs but won’t start (no drum rotation); long dry times; unusual noise (squealing, rumbling) or excessive vibration; error codes or the control not responding.
Common Causes
- Clogged lint trap or external vent restricting airflow and causing long dry times or overheating
- Failed thermal fuse, temperature thermostat, or heating element causing no-heat conditions
- Worn drum rollers, belt, idler pulley or motor bearings leading to noise or no-tumble
Popular Parts That Fix This Problem
These are the most common replacement parts that fix this problem. When you're ready to order, click below to find the right part at ProsourceParts.com — just search by your appliance model number for a guaranteed fit.

Helpful Repair Tip
Before replacing parts, verify airflow and power: clean the lint screen and vent, then run the dryer empty on a heat cycle. If it still won’t heat, test the thermal fuse and heating element for continuity with a multimeter — a failed thermal fuse is a very common cause of no-heat.
Frequently Asked Questions
Why is my LG DLE1001W not heating even though the drum is tumbling?
If the drum turns but there’s no heat, first check for restricted airflow: clean the lint trap and disconnect the exhaust vent to run the dryer briefly and see if heat returns. If airflow is fine, unplug the dryer and test the thermal fuse and heating element for continuity with a multimeter. A blown thermal fuse (open circuit) or a failed heating element typically causes a no-heat condition. Replace the open component and re-test. If you’re unsure, consult a service manual or a qualified technician.
Can I replace parts on my LG DLE1001W myself or should I call a technician?
You can replace many parts yourself if you’re comfortable with basic electrical safety and using hand tools: cleaning lint/vent, replacing the lint screen, swapping belts, drum rollers, thermal fuses and some thermostats are common DIY jobs. Always unplug the dryer before servicing, keep track of fasteners, and take photos for reassembly. Tasks involving high-voltage connections, the control board, or gas components (if applicable to other models) are best handled by a qualified technician. If in doubt, get a professional diagnosis to avoid unnecessary part purchases.
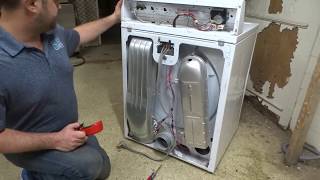
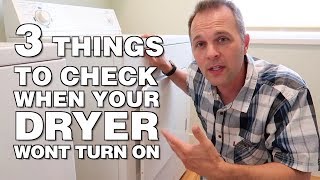
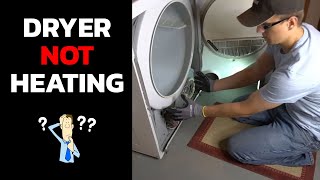
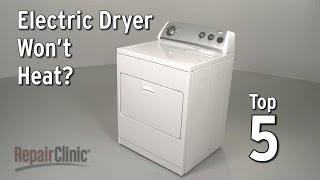
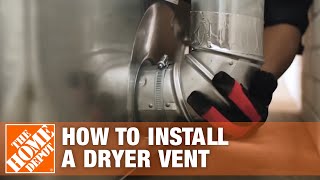
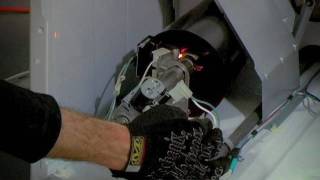
Related How-To Videos
Real DIY Repair Stories
Be the first to share your repair story!
Share Your Repair Story
Your experience helps other homeowners fix their appliances. Tell us how it went!
Can't Fix It Yourself? Find a Local Technician
It's perfectly okay to call a professional. Some repairs require specialized tools, deep teardowns, or dealing with complex systems that are better left to the pros.

Find the Right Part for Your Appliance
Don't guess — search your exact appliance model number at ProsourceParts.com to find the correct OEM compatible replacement part. They offer fast free shipping, guaranteed fit, and thousands of parts in stock.
Your Free Parts Videos
Whether your dishwasher won't drain, your dryer stopped heating, or your fridge isn't cold, we've created simple repair guides for the most common appliance problems homeowners face. Each guide explains what's going wrong, the most likely causes, and which replacement parts fix the issue. When you're ready to order, we link directly to ProsourceParts.com where you can search by model number and get the right part shipped fast.