
KitchenAid KUDC10FXSS5 Dishwasher – Common Problems and How to Fix Them
Need the replacement part? Search your model number at for guaranteed fit and fast free shipping.
Understanding the Problem
This guide covers the most common problems owners report with the KitchenAid KUDC10FXSS5 built-in dishwasher: it won't start, doesn’t drain, leaks, or runs but performs poorly. Below are clear diagnostic checks and step-by-step repair actions you can perform at home. 1) Confirm symptoms and error codes: Run a test cycle or check the display for any flashing lights or error codes. Note whether the machine gets power, whether the door latch engages, whether water fills, and whether it drains. 2) No power / won't start diagnosis and fix: a) Check house circuit breaker and the dishwasher power plug (if accessible). b) Verify door latch: open door, visually inspect latch and strike for damage. With power off at the breaker, test the door switch/latch with a multimeter for continuity when the door is closed. Replace the latch assembly if no continuity. c) Check control lock / keypad: try unlocking control lock (refer to manual) or disconnect power 60 seconds to reset the control. If touchpad is unresponsive but the control board shows power, replace the user interface (keypad). d) Check thermal fuse / control board: if there's power to the machine (lights) but control will not start at all, test the thermal fuse (if equipped) and inspect the main control board for burn marks; replace faulty parts. 3) Not draining / standing water diagnosis and fix: a) Remove and inspect the filter and sump area for debris. b) Check the drain hose for kinks and the air gap (if installed) for clogs. c) Run a short drain-only cycle and listen for the drain pump. If pump hums but doesn’t move water, remove and clean pump impeller area; if jammed or no spin and no continuity, replace the drain pump. d) Verify the garbage disposal knockout plug if recently installed — remove plug if necessary. 4) Leaking diagnosis and fix: a) Inspect door gasket for tears or dirt; clean or replace as needed. b) Check lower access panel and float assembly for water and for proper float operation — replace float switch if stuck. c) Inspect water inlet valve and fill hose connections for drips; tighten or replace valve/hoses if leaking. d) Check tub for cracks (rare) and spray arm bearings for broken seals. 5) Poor washing / spray issues: a) Clean spray arms and remove lodged debris from spray arm holes. b) Check water inlet valve for proper fill and water pressure. c) Inspect circulation pump (if separate from drain pump) and motor; test for continuity and replace if failed. 6) How to replace common parts (general steps): a) Always disconnect power at the breaker. b) Shut off the water supply and open the door to access inner screws and toe kick. c) To replace door latch: remove inner door panel screws, disconnect wiring harness, swap the latch assembly, reconnect and test. d) To replace drain pump: remove lower kickplate, place towels, disconnect drain hose and electrical connector, unmount pump, install replacement, reconnect and test for leaks. e) To replace inlet valve: shut water, remove toe kick, disconnect water line and electrical connectors, unbolt and swap valve. f) For control board or user interface: remove top console or inner door panel per service manual, document wiring locations, disconnect and replace, then run a test cycle. Safety note: Always disconnect power at the breaker and shut off the water supply before opening the dishwasher. If you are uncomfortable with electrical testing or working under the dishwasher, call a qualified appliance technician.
Common Symptoms
Dishwasher won’t start or respond, displays error lights, leaves standing water after cycle, leaks around the door, or cleans poorly
Common Causes
- Failed door latch or door switch preventing the unit from starting
- Clogged filter, drain hose, or failed drain pump causing standing water
- Faulty control board, touchpad, or thermal fuse preventing normal operation
Popular Parts That Fix This Problem
These are the most common replacement parts that fix this problem. When you're ready to order, click below to find the right part at ProsourceParts.com — just search by your appliance model number for a guaranteed fit.

Helpful Repair Tip
Start by running a short diagnostic/service cycle and listen — humming at the bottom often points to a stuck or failed drain/circulation pump; no lights but no operation points to the door latch, thermal fuse, or main control.
Frequently Asked Questions
How do I run diagnostics or see error codes on my KUDC10FXSS5?
Many KitchenAid/Whirlpool-derived dishwashers have a service/diagnostic mode you can enter from the control console. Because exact button sequences vary by model, the safest method is this: disconnect power for 30 seconds, restore power, then try starting a single short cycle and watch for any blinking lights or error codes. If you see flashes, count them and refer to the service manual. If you want to enter the technical mode, check the official KitchenAid service sheet for KUDC10FXSS5 or contact support — incorrect sequences can sometimes change stored settings. Alternatively, listen during cycle start: pump motors, fill valve click, and control beeps indicate which systems are operating.
Can I replace parts myself or should I call a pro?
You can replace many parts yourself if you have basic tools, a multimeter, and comfort working with small electrical connections and under-appliance plumbing. Simple repairs: cleaning filters, replacing spray arms, replacing the door gasket or float are typically DIY. Replacements that involve the control board, splicing wires, or working under the cabinet with gas/electric nearby should be done by a qualified technician if you’re not experienced. Always cut power at the breaker and shut off water before starting any repair.
Related How-To Videos


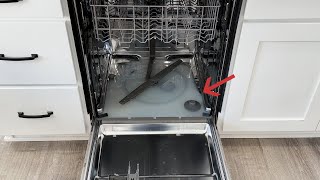
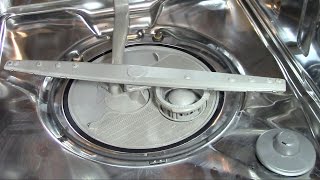
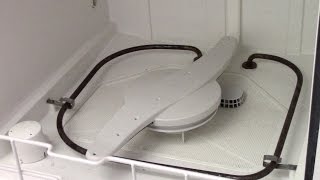

Real DIY Repair Stories
Be the first to share your repair story!
Share Your Repair Story
Your experience helps other homeowners fix their appliances. Tell us how it went!
Can't Fix It Yourself? Find a Local Technician
It's perfectly okay to call a professional. Some repairs require specialized tools, deep teardowns, or dealing with complex systems that are better left to the pros.

Find the Right Part for Your Appliance
Don't guess — search your exact appliance model number at ProsourceParts.com to find the correct OEM compatible replacement part. They offer fast free shipping, guaranteed fit, and thousands of parts in stock.
Your Free Parts Videos
Whether your dishwasher won't drain, your dryer stopped heating, or your fridge isn't cold, we've created simple repair guides for the most common appliance problems homeowners face. Each guide explains what's going wrong, the most likely causes, and which replacement parts fix the issue. When you're ready to order, we link directly to ProsourceParts.com where you can search by model number and get the right part shipped fast.