
KitchenAid KSB5MC4 Blender — Troubleshooting, Diagnosis & How to Fix It
Need the replacement part? Search your model number at for guaranteed fit and fast free shipping.
Understanding the Problem
This guide covers common problems with the KitchenAid KSB5MC4 (a typical KitchenAid 5-speed countertop blender) — why they happen and how to diagnose and fix them yourself. Follow the numbered diagnostic steps for each symptom and use the repair steps to replace or repair the failing component. Always unplug the blender before doing any disassembly or repairs. 1) Blender won't turn on (no power) - Step 1: Confirm power source — plug a known-working appliance into the same outlet. If outlet is dead, reset GFCI or check breaker. - Step 2: Inspect power cord for cuts, frays or detached wires at the base. If cord is damaged, replace the cord assembly. - Step 3: With unit unplugged, remove base screws and visually inspect the switch and wiring for burnt connectors or loose terminals. Use a multimeter to test switch continuity while actuating each speed position. - Repair: Replace the speed switch assembly if it shows no continuity in any position. Reattach wiring in the same arrangement and reassemble. 2) Motor hums but blades don't turn (coupling or gear strip) - Step 1: Remove jar and try running the motor briefly. If motor hums and you feel vibration but no rotation, it's often the drive coupling, shear pin, or internal gear clutch stripped. - Step 2: Unplug unit and remove jar coupling and blade assembly. Inspect the rubber drive coupling and plastic drive on the blade assembly for wear/rounded teeth. - Repair: Replace the blade assembly (complete with drive) or the motor coupling. Re-test before reassembling fully. 3) Poor blending / blades spin but food not processing well - Step 1: Check blade sharpness and seating — remove blade base, inspect blades and bearing. Dull or bent blades reduce chopping. - Step 2: Check for clogged vents or seized blade bearings (rust or debris). Manually spin blades (unplugged) — they should turn freely. - Repair: Replace blade assembly or bearings, sharpen or replace blades, and clean jar. Ensure correct jar/lid mounting and fill level for proper vortexing. 4) Jar leaking at base - Step 1: Remove blade assembly and inspect the gasket (rubber o-ring) and the sealing surface on the jar and blade housing. Replace the gasket if cracked, flattened, or missing. - Step 2: Check that the blade housing is tightened properly — overtightening or cross-threading can damage the seal. - Repair: Replace the gasket and/or blade assembly. Reassemble hand-tight and test with water before using with food. 5) Speed selector intermittently fails / dead speeds - Step 1: With unit unplugged, inspect the selector knob and the switch beneath for physical damage or contamination. - Step 2: Use a multimeter to check switch continuity in each speed position. Clean contacts if dirty (contact cleaner) or replace switch if contact surfaces are pitted. - Repair: Replace the control/switch module if some speeds show no continuity. 6) Overheating/automatic shutoff / burning smell - Step 1: If the blender stops after short use, let it cool for 15–30 minutes — many motors have a thermal cutoff. Re-test with small loads. - Step 2: If a burning smell or smoke appears, stop immediately and inspect motor and wiring for burn marks. Motor windings with burnt smell mean motor replacement or professional repair. - Repair: Replace thermal fuse/overload if accessible and known to be faulty; otherwise replace motor assembly or the entire base. General repair steps (typical blade/coupling/gasket replacement): - Step A: Unplug blender. Remove jar and unscrew blade base assembly. Remove old gasket and blade unit. - Step B: Clean jar lip and assemble new gasket onto new blade unit. Install blade unit into jar and tighten hand-tight. - Step C: Inspect and, if replacing, remove base cover screws to access drive coupling and switch wiring. Replace drive coupling by pulling off the motor shaft and pressing new coupling in place. - Step D: Reassemble base, test briefly with water, and verify no leaks and that all speeds work. Safety note: Always unplug the blender before opening the base, and avoid touching sharp blades. If you smell burning or see smoke, stop immediately and consider replacing the motor or the entire unit; do not attempt to run it repeatedly.
Common Symptoms
No power, motor hums but blades don't turn, poor blending performance, jar leaks at base, intermittent or dead speeds, overheating or burning smell.
Common Causes
- Worn or broken drive coupling or blade assembly
- Faulty speed switch or wiring inside the base
- Damaged jar gasket or blade bearing causing leaks or seizing
Popular Parts That Fix This Problem
These are the most common replacement parts that fix this problem. When you're ready to order, click below to find the right part at ProsourceParts.com — just search by your appliance model number for a guaranteed fit.

Helpful Repair Tip
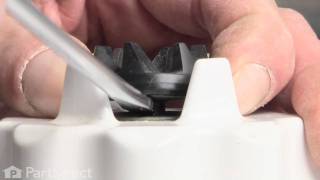
To confirm a bad drive coupling: remove the jar and run the blender briefly — if the motor hums and the coupling on the base turns but the blade drive (on the jar) is worn or slips, replace the jar blade assembly or the rubber coupling.
Frequently Asked Questions
My blender hums but the blades don’t move — is the motor bad?
Not necessarily. A humming motor often means the motor is getting power but the mechanical drive is failing — usually the rubber drive coupling or the jar blade drive is stripped. Remove the jar and blade assembly and inspect the drive teeth and coupling. Replace the coupling or blade assembly first; only replace the motor if the motor shaft or windings are damaged or if the motor fails to start at all after coupling replacement.
Can I replace the blade gasket or coupling myself?
Yes — gasket and drive coupling replacements are common DIY repairs. Always unplug the blender, remove the jar and blade assembly, and follow the manufacturer's instructions. Use replacement parts specified for the KSB5MC4 (or check KitchenAid's parts lookup by model). If the repair requires opening the base and you’re not comfortable with wiring or motor work, consider a professional or replacing the unit.
Related How-To Videos

Real DIY Repair Stories
Be the first to share your repair story!
Share Your Repair Story
Your experience helps other homeowners fix their appliances. Tell us how it went!
Can't Fix It Yourself? Find a Local Technician
It's perfectly okay to call a professional. Some repairs require specialized tools, deep teardowns, or dealing with complex systems that are better left to the pros.

Find the Right Part for Your Appliance
Don't guess — search your exact appliance model number at ProsourceParts.com to find the correct OEM compatible replacement part. They offer fast free shipping, guaranteed fit, and thousands of parts in stock.
Your Free Parts Videos
Whether your dishwasher won't drain, your dryer stopped heating, or your fridge isn't cold, we've created simple repair guides for the most common appliance problems homeowners face. Each guide explains what's going wrong, the most likely causes, and which replacement parts fix the issue. When you're ready to order, we link directly to ProsourceParts.com where you can search by model number and get the right part shipped fast.