
KitchenAid KDTE254ESS1 Dishwasher — Common Problems, Diagnostics & How to Fix Them
Need the replacement part? Search your model number at for guaranteed fit and fast free shipping.
Understanding the Problem
Overview: The KitchenAid KDTE254ESS1 is a built-in 24" dishwasher. The most common issues with this model are: not draining, not starting or not completing cycles, inadequate cleaning, leaks, and unusual noises. Below are practical diagnostic and repair steps that cover these frequent failures. 1) Safety first - Turn off power at the circuit breaker before accessing the dishwasher. Confirm power is off with a non-contact voltage tester. Turn off the water supply if you will disconnect plumbing. 2) Start with the simple checks (5–10 minutes) - Check the filter and sump: Remove the lower rack and take out the filter assembly. Clean food debris and check for blockages in the sump. - Inspect spray arms: Remove and run water through them; clear clogged jets with a needle. - Check the door latch: Make sure the door closes and latches firmly (dishwasher will not start if the latch is faulty). 3) Not draining (common) - Symptom confirmation: Water remains in the bottom after the cycle. - Checks: Remove debris from filter and sump. Inspect the drain hose for kinks and the air gap (if installed) for clogs. Run a short drain-only cycle and listen for the drain pump. - Diagnostic: If you hear the pump humming or running but no water is pumped out, the drain pump may be blocked or failed. If the pump does not run at all, it could be electrical (control board, wiring) or the pump is dead. - Repair steps: 1. Disconnect power and remove lower kick panel. 2. Access and inspect the drain pump: remove hose clamps and visually check for debris, broken impeller, or foreign objects. 3. If blocked, clear obstruction and reassemble. If the impeller is broken or the pump motor does not run when powered, replace the drain pump assembly. 4. Reconnect hoses securely and test. 4) Won't start / doesn't complete cycle - Symptom confirmation: No response when starting or cycle stops mid-way. - Checks: Verify house power and that the breaker is on. Check door latch and switch. Look for flash/blink error codes or lights. - Diagnostic: Remove the toe-kick to access the tech sheet/diagnostic connector (behind the lower kick panel or control panel). The tech sheet lists test mode entry and codes. Use a multimeter to test continuity of the door switch, thermal fuse (if present), and control board connections. - Repair steps: 1. Confirm door switch continuity with a multimeter. Replace latch assembly if open when closed. 2. If control board is unresponsive and all other parts check OK, replace the control board or user interface keypad as indicated by error codes. 5) Poor cleaning / food left on dishes - Symptom confirmation: Dishes come out with dried food, film, or grease. - Checks: Use the correct detergent, check water temperature (should be 120°F at the tap), ensure spray arms rotate freely, check inlet valve for proper fill, and ensure filters aren’t clogged. - Repair steps: 1. Clean spray arms and filter assembly thoroughly. 2. Verify proper hot water supply at the sink. If water doesn’t heat, test the dishwasher’s heating element/thermostat. 3. Replace water inlet valve if dishwasher is underfilling. 6) Leaks - Symptom confirmation: Visible water under/to the front of the dishwasher or on the floor. - Checks: Inspect door gasket for cracks, torn or compressed spots; check hose connections, tub seams, and the inlet/drain hoses. - Repair steps: 1. Tighten hose clamps and re-seat hoses. Replace split or soft hoses. 2. Replace the door gasket/boot if damaged. 3. If leak appears from tub seam, the tub may need replacement or professional repair. 7) Noisy operation (grinding, squealing, or rattling) - Symptom confirmation: Unusual noise that wasn’t there before. - Checks: Remove lower rack and check for foreign objects near the chopper or pump. Inspect spray arm bearings and rollers for wear. - Repair steps: 1. Remove debris from the chopper assembly/sump. 2. If grinding/pump noise remains, replace the circulation pump/motor assembly. 8) How to replace common parts (general procedure) - Always disconnect power and water supply. - Remove the kick plate and toe panel to access internal components. - For pumps and motors: drain hoses first, unclip electrical connectors (note positions or take pictures), remove mounting screws, swap assemblies, then reassemble and test. - For door gasket: open door, pull out the old gasket, seat new gasket into the channel and make sure it compresses evenly when door closes. - For control panels: remove screws, disconnect ribbon/display and wiring harnesses, install the replacement, and test in diagnostics. 9) Final testing - Reconnect power and run a short wash or diagnostic mode to verify the repair. Check for leaks during the fill and drain phases, and confirm normal operation. Safety note: Always disconnect electrical power and shut off the water supply before performing repairs. If you are unsure about handling electrical components, leaking water near electrical parts, or gas connections (if applicable), hire a licensed technician.
Common Symptoms
Not draining, won't start, dishwasher stops mid-cycle, water leaks, noisy operation, or poor cleaning performance.
Common Causes
- Clogged filter, spray arms, or drain hose
- Failed drain pump or circulation motor
- Faulty door latch or door switch preventing start
- Water inlet valve or heating element failure causing poor cleaning
- Worn door gasket or loose hose causing leaks
- Control board or user interface failure
Popular Parts That Fix This Problem
These are the most common replacement parts that fix this problem. When you're ready to order, click below to find the right part at ProsourceParts.com — just search by your appliance model number for a guaranteed fit.

Helpful Repair Tip
To confirm a failed drain pump: run a drain-only cycle and listen—if the pump hums but nothing drains, the impeller is likely blocked or broken; if it’s silent and power is present, test the pump motor with a multimeter for continuity or replace the pump.
Frequently Asked Questions
How do I access diagnostic codes or run service mode on my KDTE254ESS1?
Most KitchenAid/Whirlpool dishwashers include a tech sheet and diagnostic procedure behind the lower kick panel or inside the control area. Power off, remove the toe kick and locate the tech sheet — it has the exact button sequence to enter diagnostics and a list of error codes. If you don’t have the sheet, remove the toe-kick and look for a sticker with diagnostics instructions or consult the official KitchenAid parts/tech documentation for KDTE254ESS1.
Can I replace major parts (pump, valve, control) myself?
Yes, if you are comfortable turning off power and water, using basic hand tools, and following step-by-step instructions. Replacing pumps, valves, gaskets and control boards is typically straightforward: disconnect power, remove toe-kick, note wiring positions or take photos, unclip connectors, remove mounting screws, swap parts, and reassemble. If you are unsure about electrical testing, or if the repair involves tub replacement or water leaks near electrical components, hire a qualified appliance technician.
Related How-To Videos


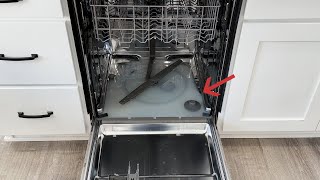
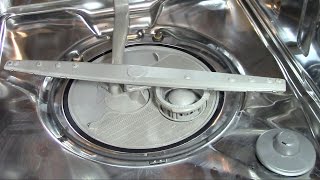
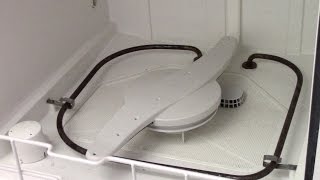

Real DIY Repair Stories
Be the first to share your repair story!
Share Your Repair Story
Your experience helps other homeowners fix their appliances. Tell us how it went!
Can't Fix It Yourself? Find a Local Technician
It's perfectly okay to call a professional. Some repairs require specialized tools, deep teardowns, or dealing with complex systems that are better left to the pros.

Find the Right Part for Your Appliance
Don't guess — search your exact appliance model number at ProsourceParts.com to find the correct OEM compatible replacement part. They offer fast free shipping, guaranteed fit, and thousands of parts in stock.
Your Free Parts Videos
Whether your dishwasher won't drain, your dryer stopped heating, or your fridge isn't cold, we've created simple repair guides for the most common appliance problems homeowners face. Each guide explains what's going wrong, the most likely causes, and which replacement parts fix the issue. When you're ready to order, we link directly to ProsourceParts.com where you can search by model number and get the right part shipped fast.