
Kenmore Stacking Kit – What It Fixes and How to Install or Replace
Need the replacement part? Search your model number at for guaranteed fit and fast free shipping.
Understanding the Problem
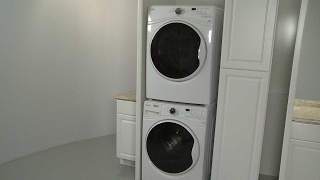
A Kenmore stacking kit is a bracket-and-fastener set used to secure a front‑load dryer on top of a front‑load washer. It prevents the dryer from shifting, sliding, or falling during spin cycles and reduces excessive vibration and noise. If your stacked units move, bang, or look misaligned, a missing, loose, or damaged stacking kit is a likely cause. 1) Verify compatibility and part: Check both appliance model numbers (usually on a sticker behind the washer door or on the back) to confirm a manufacturer-recommended stacking kit — stacking kits are model-specific. 2) Turn off and disconnect: Unplug electric dryers; for gas dryers turn off the gas supply and unplug the unit. Make sure both machines are empty. 3) Inspect the kit and mounts: Remove the dryer (you’ll need two people) and inspect the bracket plates, bolts, and screw bosses on the washer top and dryer base for bent or stripped parts and missing hardware. 4) Tighten hardware: If the original kit is present but loose, tighten all bolts and screws per the kit instructions, then re-seat the dryer and test for movement. 5) Replace damaged/missing kit: If brackets are bent, fasteners stripped, or the kit is missing, remove the old hardware, position the new stacking plate(s) on the washer per the kit instructions, fasten with the supplied bolts into the washer’s threaded holes, then carefully set the dryer on top and secure the dryer to the bracket with the kit’s bolts/nuts. Use two people and avoid pinching any hoses or cords. 6) Level and test: After securing, level the washer (adjust leveling legs) so the stacked pair are even. Run a spin and a dryer cycle to confirm no sliding, excessive vibration, or banging. 7) Final checks: Confirm clearances around the dryer vent and that gas line (if present) and electrical cord are not under strain. Safety note: always disconnect power (and gas for gas dryers) before working. If the washer or dryer cannot be safely lifted or aligned, hire a technician. This guide gives the practical steps to diagnose and fix stacking‑kit issues; if your model requires a specific OEM kit, order the correct kit before attempting reinstall.
Common Symptoms
Dryer slides or shifts during spin, loud banging or scraping noises, visible gap or misalignment between washer and dryer, bent brackets, stripped bolt heads, or dryer rocking on the washer.
Common Causes
- Missing or never-installed stacking kit
- Loose or stripped mounting bolts
- Bent or damaged stacking brackets from impact
- Incompatible washer/dryer models or incorrect kit
- Uneven washer leveling causing instability
Popular Parts That Fix This Problem
These are the most common replacement parts that fix this problem. When you're ready to order, click below to find the right part at ProsourceParts.com — just search by your appliance model number for a guaranteed fit.

Helpful Repair Tip
If the dryer shifts when you push it lightly from the top center, the stacking kit is loose or missing. Also check for loose bracket bolts by feeling for play where the bracket meets the washer top.
Frequently Asked Questions
Can I stack any Kenmore washer and dryer using a stacking kit?
No. Only front‑loading washers and front‑loading dryers that are compatible in width and weight should be stacked. Some pairings require a model‑specific stacking kit. Top‑load washers cannot be stacked with a dryer. Always confirm compatibility using the model/serial tags and the manufacturer’s stacking kit recommendation.
How difficult is it to install a Kenmore stacking kit and do I need a professional?
Installing a stacking kit is usually a straightforward DIY job for two people: attach the brackets to the washer, lift and place the dryer on top, and secure with the supplied hardware. Expect 30–60 minutes. However, if the kit or bolt holes are damaged, if the dryer is gas (you must disconnect/reconnect gas safely), or if you cannot safely lift the dryer, hire a technician. Always disconnect power and gas first and follow the kit’s instructions.
Related How-To Videos


Real DIY Repair Stories
Be the first to share your repair story!
Share Your Repair Story
Your experience helps other homeowners fix their appliances. Tell us how it went!
Can't Fix It Yourself? Find a Local Technician
It's perfectly okay to call a professional. Some repairs require specialized tools, deep teardowns, or dealing with complex systems that are better left to the pros.

Find the Right Part for Your Appliance
Don't guess — search your exact appliance model number at ProsourceParts.com to find the correct OEM compatible replacement part. They offer fast free shipping, guaranteed fit, and thousands of parts in stock.
Your Free Parts Videos
Whether your dishwasher won't drain, your dryer stopped heating, or your fridge isn't cold, we've created simple repair guides for the most common appliance problems homeowners face. Each guide explains what's going wrong, the most likely causes, and which replacement parts fix the issue. When you're ready to order, we link directly to ProsourceParts.com where you can search by model number and get the right part shipped fast.