
Kenmore 110.21302013 Leaking from Bottom – Causes and Parts That Fix It
Need the replacement part? Search your model number at for guaranteed fit and fast free shipping.
Understanding the Problem
When a Kenmore model 110.21302013 leaks from the bottom, water is escaping somewhere under the cabinet — usually during fill, wash, or drain. The most frequent sources are the drain pump and its hoses, a failed tub seal or outer tub crack, or a loose/broken connection at the inlet or drain ports. Leaks can be steady drips, puddles after a cycle, or spray during spin/drain and sometimes produce error codes or abnormal noises. To diagnose, observe when the leak happens (during fill, wash, or drain). Carefully remove the lower access panel (or tilt the machine back if there’s no panel) and run a short cycle while watching for the stream. Inspect hoses, clamps, the pump body, and the area around the tub seal. Before doing any work, unplug the washer and shut off water to avoid electrical hazard and further water damage.
Common Symptoms
Puddles or continuous dripping from beneath the washer, water visible around the pump or hoses, leaks that occur only during drain/spin, unusual noises during drain, or damp flooring/cabinetry under the machine.
Common Causes
- Faulty or cracked drain pump housing or seal
- Loose, cracked, or improperly clamped drain/tub hoses
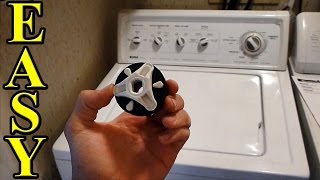
- Worn tub seal, outer tub crack, or a loose tub-to-pump elbow/connection
Popular Parts That Fix This Problem
These are the most common replacement parts that fix this problem. When you're ready to order, click below to find the right part at ProsourceParts.com — just search by your appliance model number for a guaranteed fit.
Helpful Repair Tip
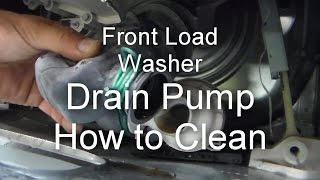
Remove the lower access panel, place towels under the washer, run a drain cycle, and watch the pump area — if the leak appears there the drain pump or the pump-to-tub hose is the likely culprit.
Frequently Asked Questions
How can I quickly find exactly where the washer is leaking from?
Turn off and unplug the washer, remove lower access panel or tilt back the machine, place towels/containers under it, then run a short drain or spin cycle while watching the underside. Use a flashlight to follow the water trail. Dry suspected areas first so you can see fresh drips. If the leak only appears during fill, inspect inlet valve and hoses; if during drain/spin, check the drain pump and hoses.
Can I repair this leak myself and how difficult is it?
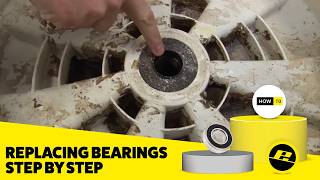
Many leaks are DIY-friendly if they’re from a cracked hose, loose clamp, or a pump replacement. Basic tools (screwdrivers, pliers, towels) and the ability to drain/remove a hose are required. Replacing a drain pump or hoses is medium difficulty; replacing tub seals or bearings is advanced and often requires disassembling the transmission/tub — that’s best left to a technician. Always unplug the washer and shut off water before starting repairs.
Related How-To Videos
Real DIY Repair Stories
Be the first to share your repair story!
Share Your Repair Story
Your experience helps other homeowners fix their appliances. Tell us how it went!
Can't Fix It Yourself? Find a Local Technician
It's perfectly okay to call a professional. Some repairs require specialized tools, deep teardowns, or dealing with complex systems that are better left to the pros.
Find the Right Part for Your Appliance
Don't guess — search your exact appliance model number at ProsourceParts.com to find the correct OEM compatible replacement part. They offer fast free shipping, guaranteed fit, and thousands of parts in stock.
Your Free Parts Videos
Whether your dishwasher won't drain, your dryer stopped heating, or your fridge isn't cold, we've created simple repair guides for the most common appliance problems homeowners face. Each guide explains what's going wrong, the most likely causes, and which replacement parts fix the issue. When you're ready to order, we link directly to ProsourceParts.com where you can search by model number and get the right part shipped fast.