
How to Install a Refrigerator Water Inlet Valve — Step-by-Step Guide
Need the replacement part? Search your model number at for guaranteed fit and fast free shipping.
Understanding the Problem
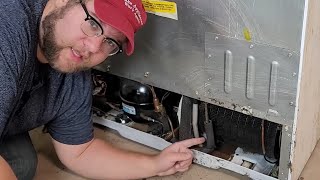
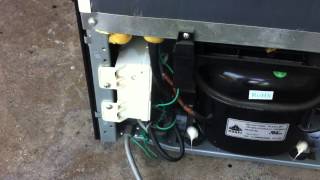
The water inlet valve is the component that controls water flow to the ice maker and dispenser. If it’s missing, damaged, clogged, or incorrectly installed, you’ll get no water at the dispenser or ice maker, slow fills, or leaks. Installing the inlet valve correctly ensures reliable water delivery and prevents leaks that can damage flooring. This guide covers the typical installation process: shut off power and water, remove access panels, disconnect the old valve and tubing, mount the new valve, reconnect tubing and electrical connectors, then test for proper operation and leaks. Exact steps and the valve location vary by brand and model, so have your refrigerator model number handy and confirm that the replacement valve matches the fittings and electrical connector of your unit.
Common Symptoms
No water at dispenser, ice maker not filling, very slow fill, intermittent filling, or visible leaking near the inlet valve area.
Common Causes
- Failed solenoid or internal valve assembly preventing water flow
- Clogged debris or mineral buildup inside the valve or inlet screen
- Incorrect or loose tubing/fitting installation leading to restriction or leaks
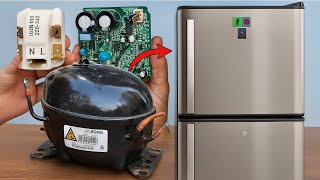
Popular Parts That Fix This Problem
These are the most common replacement parts that fix this problem. When you're ready to order, click below to find the right part at ProsourceParts.com — just search by your appliance model number for a guaranteed fit.

Helpful Repair Tip
Confirm the valve is the problem before installing: turn water on and listen for a click at the valve while calling for water; test the valve coil with a multimeter (expect low ohms continuity). Also verify inlet tubing size (usually 1/4" OD) so fittings match.
Frequently Asked Questions
Do I need to turn off the water and power before installing the valve?
Yes. Always shut off the refrigerator’s water supply at the shut-off valve and unplug the refrigerator (or turn off the circuit breaker) before starting. This prevents flooding and electrical shock while you work.
How long does it take and can I do this myself?
Most DIY installs take 30–90 minutes depending on access and your experience. If you are comfortable with basic hand tools, turning off water, and reconnecting tubing and a couple of electrical connectors, you can usually do it yourself. If you find corrosion, damaged lines, or unclear wiring, or if you’re unsure of matching parts, call a qualified appliance technician or plumber.
Related How-To Videos


Real DIY Repair Stories
Be the first to share your repair story!
Share Your Repair Story
Your experience helps other homeowners fix their appliances. Tell us how it went!
Can't Fix It Yourself? Find a Local Technician
It's perfectly okay to call a professional. Some repairs require specialized tools, deep teardowns, or dealing with complex systems that are better left to the pros.

Find the Right Part for Your Appliance
Don't guess — search your exact appliance model number at ProsourceParts.com to find the correct OEM compatible replacement part. They offer fast free shipping, guaranteed fit, and thousands of parts in stock.
Your Free Parts Videos
Whether your dishwasher won't drain, your dryer stopped heating, or your fridge isn't cold, we've created simple repair guides for the most common appliance problems homeowners face. Each guide explains what's going wrong, the most likely causes, and which replacement parts fix the issue. When you're ready to order, we link directly to ProsourceParts.com where you can search by model number and get the right part shipped fast.