
GE Microwave JES1656SJ02 Fuse Blowing – What Causes It & How to Fix It
Need the replacement part? Search your model number at for guaranteed fit and fast free shipping.
Understanding the Problem
Brief explanation: When the internal fuse in your GE JES1656SJ02 microwave blows repeatedly (or immediately when you plug it in or press start), it means a short or gross fault on the high-voltage side or a failed safety device is allowing excessive current. The most common culprits are the high-voltage diode, high-voltage capacitor, magnetron, door switches, or a failed control board. Follow these step-by-step diagnostics and repair instructions to find and fix the problem. 1) Safety first and preparation a) Unplug the microwave and do not operate with the cabinet removed unless you know what you're doing. Even unplugged, the high-voltage capacitor can hold a lethal charge. Wear safety glasses and insulated gloves. Have an insulated screwdriver and a high-value resistor (20k–100k ohm, 5–10 W) for safe capacitor discharge if you will be working on it. b) Tools: multimeter with diode and capacitance ranges (or a dedicated capacitance meter), insulated pliers, nut drivers/screwdrivers to remove cabinet, small flashlight, replacement parts if identified. 2) Confirm the symptom and fuse type a) Replace the blown fuse with the exact same type/amp rating only for testing. If it blows immediately when you plug in the microwave (no cooking), it’s a hard short. If it blows only when you start a cook cycle, the high-voltage chain is suspect. b) Note where the fuse is located: some models have a slow-blow/ceramic fuse on the mains board and a thermal fuse/cutout near the cooking cavity. 3) Visual inspection a) Remove the cabinet per service manual instructions. Inspect for burn marks, melted insulation, arcing at connectors, blackened components, or a cracked magnetron. b) Smell for burnt components — a burned diode or magnetron often has a distinct burnt-electrical odor. 4) Test the door switches a) With the cabinet off and power removed, test each door switch for proper continuity when actuated. A shorted switch or misaligned actuator can short the line and cause blown fuses. Replace any switch that shows inconsistent or short-to-ground readings. 5) Discharge the high-voltage capacitor safely a) Before testing diode/capacitor/magnetron, discharge the capacitor using a high-value resistor (20k–100k, 5–10W): attach insulated leads to the resistor, bridge the two capacitor terminals briefly while holding insulated handles. Verify with a voltmeter; voltage should be near 0V. b) Do NOT short the capacitor with a screwdriver — that can damage parts and create sparks. 6) Test the high-voltage diode a) Remove one side of diode from the circuit to isolate it. Use the diode test of your meter: a good microwave HV diode normally shows a diode drop in one direction and open in the other. Many HV diodes include a high-voltage capacitor or doubled diode arrangement; reference service manual for expected values. b) A shorted or low-resistance diode will blow the fuse and must be replaced. 7) Test the high-voltage capacitor a) With the capacitor safely discharged and isolated, use a capacitance meter to measure value. Typical microwave caps are ~0.9–1.2 µF (check your manual). A reading far from the expected value or a short to ground indicates failure. b) If your meter lacks capacitance, check for a short (very low ohms) between terminals or to chassis ground — either is a fail. 8) Test the magnetron a) Inspect magnetron cavity for white powder or burned areas. With it isolated, measure resistance between filament pins (low ohms are normal, usually a couple of ohms) and between each filament pin and the magnetron case (should be open/high resistance). A short to case indicates a damaged magnetron that will blow fuses and must be replaced. b) Magnetron replacement is common but can be costly; weigh cost vs. replacement microwave. 9) Inspect the control electronics and power entry components a) If diode, cap, magnetron, and door switches test OK, inspect the control board, power entry switch, and main fuse holder for shorted components or solder joints. A shorted triac or burnt relay on the control board can blow fuses. b) Replace the control board only if testing shows it is defective or visibly damaged. 10) Replace faulty parts and re-test a) Replace the failed part(s) with OEM or quality equivalent components. Reassemble enough to safely test — some technicians use a GFCI-protected outlet and a fused test cord for additional safety. b) Replace the fuse with the correct type and rating. Power up and perform a short test and then a short no-load run (just a few seconds) while observing for smoke, smell, or abnormal sounds. 11) Final assembly and verification a) Once testing is successful, reassemble the cabinet, verify door latches and switches, and run a few oven-safe tests to ensure microwave heats normally and fuse stays intact. Safety note: The microwave high-voltage circuit can kill you. If you are not completely comfortable or experienced with high-voltage electronics and safe capacitor discharge techniques, stop and hire a qualified appliance service technician.
Common Symptoms
Fuse blows immediately when plugged in, blows when starting cook cycle, visible burn marks or arcing inside cabinet, microwave does not heat, burning smell.
Common Causes
- Shorted or failed high-voltage diode
- Shorted or leaky high-voltage capacitor
- Failed magnetron with short to chassis
- Shorted door switch or misaligned door actuator
- Faulty control board or shorted mains components (rare)
Popular Parts That Fix This Problem
These are the most common replacement parts that fix this problem. When you're ready to order, click below to find the right part at ProsourceParts.com — just search by your appliance model number for a guaranteed fit.

Helpful Repair Tip
If the fuse blows as soon as you plug the microwave in (no cooking), suspect a shorted high-voltage diode, capacitor, or magnetron — do a visual check first, then safely discharge the capacitor and test the diode and capacitor with a multimeter.
Frequently Asked Questions
Can I just replace the fuse and expect the microwave to work?
Not safely. Replacing the fuse without diagnosing the root cause will likely lead to the replacement fuse blowing again, and could create a fire or safety hazard. The fuse is a symptom — you must identify whether the diode, capacitor, magnetron, door switches, or control board is shorted before permanently replacing the fuse.
How do I safely discharge the microwave capacitor?
Unplug the microwave. Use an insulated tool to attach a high-value resistor (20k–100k ohm, 5–10W) across the capacitor terminals to slowly bleed off charge — hold securely with insulated handles or clips. After discharging, verify with a voltmeter that the voltage is near 0V. Never short the capacitor directly with a screwdriver (creates dangerous sparks and can damage components). If unsure, have a trained technician perform the work.
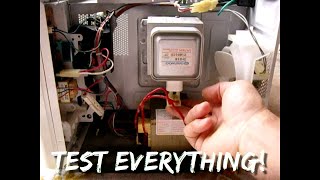
Related How-To Videos



Real DIY Repair Stories
Be the first to share your repair story!
Share Your Repair Story
Your experience helps other homeowners fix their appliances. Tell us how it went!
Can't Fix It Yourself? Find a Local Technician
It's perfectly okay to call a professional. Some repairs require specialized tools, deep teardowns, or dealing with complex systems that are better left to the pros.

Find the Right Part for Your Appliance
Don't guess — search your exact appliance model number at ProsourceParts.com to find the correct OEM compatible replacement part. They offer fast free shipping, guaranteed fit, and thousands of parts in stock.
Your Free Parts Videos
Whether your dishwasher won't drain, your dryer stopped heating, or your fridge isn't cold, we've created simple repair guides for the most common appliance problems homeowners face. Each guide explains what's going wrong, the most likely causes, and which replacement parts fix the issue. When you're ready to order, we link directly to ProsourceParts.com where you can search by model number and get the right part shipped fast.