
GE GLEQ642AS2 Range — Troubleshoot & Repair Oven and Cooktop Issues
Need the replacement part? Search your model number at for guaranteed fit and fast free shipping.
Understanding the Problem
This guide covers the most common problems owners encounter with the GE GLEQ642AS2 range (primarily electric ranges) and gives step-by-step diagnostics and repair actions. Follow these steps to identify the faulty component and perform a safe repair. 1) Confirm model and power type - Locate the model/serial plate (usually on the oven door frame or behind the drawer). Confirm GLEQ642AS2 and whether your range is electric or gas. This guide assumes an electric range; if yours is gas, ignition items change. 2) General safety and prep - Turn off power at the breaker and verify power is off with a non-contact tester. Unplug the range if reachable. Wear safety gloves and eye protection. Take photos of wiring before disconnecting anything. 3) Problem: Oven won’t heat (no heat or weak heat) - Step A: Check power. Verify both legs of the 240V supply at the terminal block (use a multimeter: ~240VAC between L1 and L2). If no voltage, check the breaker and terminal connections. - Step B: Check the bake and broil elements. Remove the oven racks and visually inspect elements for breaks or blisters. Disconnect element terminals and measure continuity with an ohmmeter. Typical intact element reads a few ohms to a few tens of ohms; open (OL) = bad. Replace the failed element. - Step C: Check the oven temperature sensor (NTC). Remove the sensor from the oven back and measure resistance at room temp — usually ~1000 ohms (varies by model; check spec). If reading wildly off or open, replace the sensor. - Step D: Check error codes and the electronic control board. If elements and sensor are good, run basic self-test (if available in your model) or look for F-codes on the display. A control board that won’t drive the elements or shows many different faults may need replacement. - How to replace elements/sensor: after power off, remove the rear oven panel or access through oven cavity, disconnect connectors, swap the part, resecure mounting screws and insulation, restore power and test. 4) Problem: Surface burners or cooktop elements don’t heat - Step A: For coil-style elements, inspect the coil for visible damage and test continuity. If open, replace the coil. - Step B: Remove the cooktop element and check the receptacle (the female connector where the element plugs in). Look for burn marks or melted plastic; if the receptacle is damaged, replace it and the element if needed. - Step C: If element and receptacle are OK but heat is intermittent, check the infinite switch (the control behind the knob). Remove the knob and control panel, test switch continuity at several settings. Replace the infinite switch if it fails continuity tests. 5) Problem: Oven display, touchpad, or controls are unresponsive or show scrambled codes - Step A: Verify supply voltage to the control board. If the board has power but the display is blank or frozen, try doing a power reset: disconnect power for 60 seconds and reconnect. - Step B: If still blank or showing errors, inspect the control board and touchpad ribbon. Reseating the ribbon connectors can fix communication issues. - Step C: If control board fails self-test or shows multiple unrelated errors after reseating, replace the control board (and consider replacing the keypad if it was strained or sticky). 6) Problem: Oven door lock / self-clean stuck - Step A: If door won’t unlock after self-clean, cut power for several minutes then restore power; many models unlock on power restore. - Step B: If lock motor or latch is seized, access the door lock assembly (usually behind the control panel or top panel) and test the lock motor for continuity. Replace the door lock assembly if mechanical parts are broken. 7) Final verification - After any replacement, restore power and run the oven on Bake and Broil to confirm proper operation. Use an oven thermometer to verify temperature accuracy after repairs. Safety note: Always disconnect all power before servicing. If you’re not comfortable working with high voltage or gas connections, stop and hire a qualified technician.
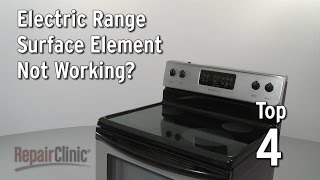
Common Symptoms
Oven won’t heat or heats weakly, surface burners not working, intermittent cooktop heating, blank or error-filled display, oven door locked after self-clean.
Common Causes
- Failed bake or broil heating element
- Bad oven temperature sensor or control board
- Burnt cooktop receptacle or faulty infinite switch
Popular Parts That Fix This Problem
These are the most common replacement parts that fix this problem. When you're ready to order, click below to find the right part at ProsourceParts.com — just search by your appliance model number for a guaranteed fit.

Helpful Repair Tip
Before replacing parts, verify the fault with measurements: check for 240V at the terminal block, continuity on heating elements, and ~1000Ω on the oven sensor at room temperature. Photograph wiring before disconnecting to ensure correct reassembly.
Frequently Asked Questions
How do I find the exact replacement part numbers for my GLEQ642AS2?
Locate the model/serial plate on the range (behind the oven door or on the frame) and use that exact model number when searching parts. Enter GLEQ642AS2 on the GE Appliance parts site or trusted parts sellers. Cross-check the part diagrams for bake/broil elements, sensors, and control boards before ordering.
When should I replace the range instead of repairing it?
Consider replacement if repair costs approach or exceed half the value of a new range, if multiple major components (control board, elements, sensor) have failed, or if the appliance is over 10–12 years old and has recurring problems. Also replace rather than repair if you’re uncomfortable working with 240V electrical connections or gas components.
Related How-To Videos

Real DIY Repair Stories
Be the first to share your repair story!
Share Your Repair Story
Your experience helps other homeowners fix their appliances. Tell us how it went!
Can't Fix It Yourself? Find a Local Technician
It's perfectly okay to call a professional. Some repairs require specialized tools, deep teardowns, or dealing with complex systems that are better left to the pros.

Find the Right Part for Your Appliance
Don't guess — search your exact appliance model number at ProsourceParts.com to find the correct OEM compatible replacement part. They offer fast free shipping, guaranteed fit, and thousands of parts in stock.
Your Free Parts Videos
Whether your dishwasher won't drain, your dryer stopped heating, or your fridge isn't cold, we've created simple repair guides for the most common appliance problems homeowners face. Each guide explains what's going wrong, the most likely causes, and which replacement parts fix the issue. When you're ready to order, we link directly to ProsourceParts.com where you can search by model number and get the right part shipped fast.