
FWT647G Washer — Model Clarification and Common Repair Guide
Need the replacement part? Search your model number at for guaranteed fit and fast free shipping.
Understanding the Problem
You supplied “FWT647G,” which appears to be a washer model code but doesn’t include brand or full model details. Before ordering parts or performing repairs, confirm the exact model and serial number (see FAQ below). Below is a practical, prioritized diagnostic and repair workflow for the most common problems on top‑load washers that use codes like this, plus specific step-by-step how-to instructions. 1) Confirm model and safety prep - Locate the full model/serial sticker: common places are inside the lid/tub rim, on the back panel, or on the cabinet base. Write down brand, model, and serial before ordering parts. - Safety: UNPLUG the washer and shut off both water valves. If you must test with power on, keep hands clear of moving parts and water. Place towels/buckets to catch water before disconnecting hoses. 2) Basic quick checks (applies to most no-start, fill, spin, drain issues) - Check power: verify outlet has 120VAC (or correct mains) using a multimeter; check the household breaker. - Inspect hoses: fill and drain hoses for kinks, clogs, or leaks. Remove the drain hose and run water through it to check flow. - Error codes / display lights: note any blinking lights or codes and report them—these point to specific components. 3) Washer won’t start or won’t agitate - Likely culprits: lid switch/door lock, start switch/timer/control board, faulty wiring, thermal fuse. - How to diagnose and fix: a. Unplug washer, remove control console or top panel to access the lid switch/door lock. Manually press the switch; listen for a click. b. Test the lid switch with a multimeter for continuity. With lid closed (or actuator pressed) it should show continuity (near 0 ohms); open = no continuity. Replace the switch if it fails. c. If switch is good, verify the start button and timer: use the meter to check continuity when buttons are pressed. d. If nothing else, check for burned connectors or a visibly damaged control board. Replace control board only after confirming upstream parts are working. 4) Washer won’t spin or won’t drain - Likely culprits: clogged drain pump/filter, faulty drain pump motor, lid switch, drive belt (belt-drive washers), motor coupling/clutch (direct-drive), blocked hoses, foreign objects in pump. - How to diagnose and fix: a. Run a drain/spin cycle and listen: if the motor hums but won’t spin, check the belt (if present) or motor coupling. If motor hums and pump is silent, suspect pump. b. Access and inspect the drain pump: remove lower access panel (or back panel). Check pump impeller for obstructions (coins, small articles). Manually try to turn impeller; if locked or seized, replace pump. c. Check drain hose for obstructions or clog at house standpipe. Clear any blockages. d. If belt-driven, inspect belt for wear/looseness and replace if glazed or broken. e. For direct-drive washers, inspect motor coupling (plastic coupler between motor and transmission) — a common wear item; replace if damaged. 5) Washer fills slowly, overfills, or won’t fill - Likely culprits: water inlet valve, pressure switch/air dome tube (water level sensor), clogged inlet screens, bad fill sensors. - How to diagnose and fix: a. Verify water supply valves fully open. Remove and inspect inlet hoses screens for debris; clean. b. Check inlet valve: unplug washer, remove valve, and test coil resistance with a multimeter (coil resistance typically in the hundreds of ohms; check service doc for exact). If valve fails to open electrically, replace it. c. Inspect the pressure switch and air tube (small rubber hose from tub to switch) for clogs or cracked tubing. Clear or replace if collapsed or blocked. 6) Washer leaks - Likely culprits: worn door seal, loose hose clamp, cracked hose, bad tub-to-pump seal, detergent drawer overflow. - How to diagnose and fix: a. Run a short cycle and observe where water appears. Dry the area and run again to pinpoint the source. b. Tighten or replace loose clamps on inlet and drain hoses. Replace damaged hoses. c. Inspect door boot (front-load) or tub seal (top-load) for cracks; replace if damaged. d. If leak under the tub, check tub-to-pump hose and pump gasket; replace leaking pump or hose. 7) Excessive vibration or noise - Likely culprits: worn shock absorbers/dampers, suspension springs, unbalanced load, foreign object in tub/pump, worn bearings. - How to diagnose and fix: a. Ensure washer is level on floor and adjust feet. b. Inspect shock absorbers or suspension rods and replace if oil soaked, torn, or weak. c. Remove the tub and spin the tub by hand; if bearings are rough or make grinding noise, the bearings or tub seal may need replacement (major job; consider professional help). 8) Final steps and testing - After any repair, reconnect water and power, run a diagnostic or test cycle, and confirm the symptom is resolved. Watch for leaks, weird noises, or error codes. Safety note: Always unplug the washer and turn off water before opening panels. Use insulated tools when working on live circuits; if you must measure voltage, keep one hand away from chassis and wear safety glasses. When in doubt or when repairs require removing the tub or replacing sealed bearings/transmission, consider hiring a qualified appliance technician.
Common Symptoms
Washer won't start, won't spin, won't drain, won't fill properly, leaks, loud noises or excessive vibration.
Common Causes
- Faulty lid/door switch or door lock preventing the washer from starting
- Clogged or failed drain pump or blocked drain hose causing no-drain/no-spin
- Worn drive components (belt, motor coupling, clutch) or bad motor causing no-spin or humming
Popular Parts That Fix This Problem
These are the most common replacement parts that fix this problem. When you're ready to order, click below to find the right part at ProsourceParts.com — just search by your appliance model number for a guaranteed fit.

Helpful Repair Tip
Confirm a bad electrical part by checking continuity with a multimeter and by listening for mechanical resistance: lid switches should click and have continuity when pressed, inlet valve coils show measurable resistance, and a seized pump impeller won't turn by hand.
Frequently Asked Questions
How do I find the exact model number for FWT647G?
Check the washer’s model/serial sticker — common locations: inside the lid/tub rim, on the back panel, behind the kick plate or on the underside of the lid. The sticker lists brand, model, and serial. Provide that full model to get exact parts and diagrams.
Can I replace these parts myself or should I hire a pro?
Many parts (lid switch, inlet valve, drain pump, belt, hoses) are DIY-friendly with basic tools and a multimeter. Tasks involving the transmission, bearings, or full tub removal are more advanced and heavy; if you’re not comfortable, hire a qualified appliance technician. Always unplug the washer and shut off water before starting.
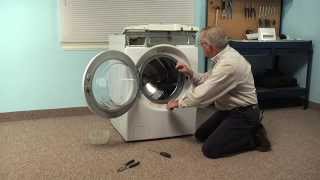
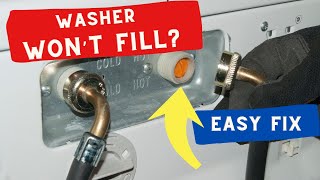
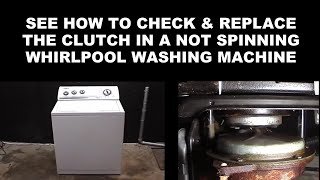
Related How-To Videos

Real DIY Repair Stories
Be the first to share your repair story!
Share Your Repair Story
Your experience helps other homeowners fix their appliances. Tell us how it went!
Can't Fix It Yourself? Find a Local Technician
It's perfectly okay to call a professional. Some repairs require specialized tools, deep teardowns, or dealing with complex systems that are better left to the pros.

Find the Right Part for Your Appliance
Don't guess — search your exact appliance model number at ProsourceParts.com to find the correct OEM compatible replacement part. They offer fast free shipping, guaranteed fit, and thousands of parts in stock.
Your Free Parts Videos
Whether your dishwasher won't drain, your dryer stopped heating, or your fridge isn't cold, we've created simple repair guides for the most common appliance problems homeowners face. Each guide explains what's going wrong, the most likely causes, and which replacement parts fix the issue. When you're ready to order, we link directly to ProsourceParts.com where you can search by model number and get the right part shipped fast.