
Dryer Drum Seals Worn or Damaged – What Part Fixes This Problem?
Need the replacement part? Search your model number at for guaranteed fit and fast free shipping.
Understanding the Problem
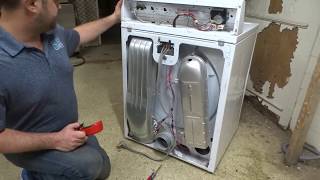
Dryer drum seals (also called felt seals, drum glides or tub-to-drum seals) sit at the front and/or rear of the drum and create a low-friction barrier between the spinning drum and the dryer bulkhead. Over time these seals compress, wear away, get contaminated with oil or lint, or tear. When that happens the drum can rub on the seal or adjacent metal, producing squeaks, scraping noises, fabric damage and heat leakage. Left unaddressed, failed drum seals let lint and moisture into the cabinet, reduce drying efficiency, and accelerate wear on drum rollers and bearings. Replacing the worn front and/or rear drum seals (and any damaged glides) restores smooth drum rotation, cuts noise, and prevents further component damage. Replacements are typically inexpensive parts but require partial disassembly — the exact procedure depends on your dryer model and brand.
Common Symptoms
Squealing or rubbing noise from the drum, visible wear or shredding of felt seals, fabric catching at the drum edge, reduced drying performance or hot/cold airflow escaping around the drum, and excess lint in the cabinet.
Common Causes
- Normal wear and compression of felt seals over years of use
- Contamination by oil (from dryers with oil-sealed bearings), water or sticky residues that degrade seal material
- Misaligned or worn drum support parts (rollers, glides, bearings) that cause abnormal contact and wear on the seal
Popular Parts That Fix This Problem
These are the most common replacement parts that fix this problem. When you're ready to order, click below to find the right part at ProsourceParts.com — just search by your appliance model number for a guaranteed fit.

Helpful Repair Tip
To confirm a bad seal, rotate the drum by hand with the dryer off. Look for light between the drum and bulkhead with a flashlight, listen for rubbing or squeal where the drum meets the opening, and feel for rough/worn felt. A thin strip of paper inserted between drum and bulkhead should slide freely; catching or tearing indicates a worn seal.
Frequently Asked Questions
Can I replace dryer drum seals myself?
Yes. Replacing drum seals is a do-it-yourself job for people comfortable with basic appliance repair and using common hand tools. Typical steps: disconnect power, remove dryer front or rear panel (depending on design), pull the drum forward to access seals, remove old felt/plastic seal material, clean mating surfaces, press or glue new seals into place, reassemble and test. Expect 1–2 hours for most models. Consult a model-specific service guide or video for the exact procedure.
How much does it cost to replace drum seals?
Parts for drum seals are inexpensive — usually $10–$40 for OEM or aftermarket seals or kits. If you hire a technician, labor typically adds $75–$200 depending on local rates and whether additional parts (rollers, bearings) need replacement. Total cost depends on model accessibility and whether related worn parts are discovered during repair.
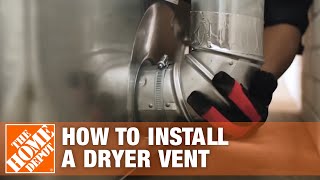
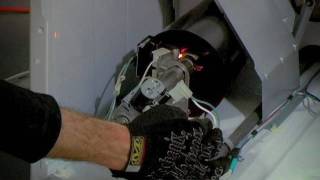
Related How-To Videos

Real DIY Repair Stories
Be the first to share your repair story!
Share Your Repair Story
Your experience helps other homeowners fix their appliances. Tell us how it went!
Can't Fix It Yourself? Find a Local Technician
It's perfectly okay to call a professional. Some repairs require specialized tools, deep teardowns, or dealing with complex systems that are better left to the pros.

Find the Right Part for Your Appliance
Don't guess — search your exact appliance model number at ProsourceParts.com to find the correct OEM compatible replacement part. They offer fast free shipping, guaranteed fit, and thousands of parts in stock.
Your Free Parts Videos
Whether your dishwasher won't drain, your dryer stopped heating, or your fridge isn't cold, we've created simple repair guides for the most common appliance problems homeowners face. Each guide explains what's going wrong, the most likely causes, and which replacement parts fix the issue. When you're ready to order, we link directly to ProsourceParts.com where you can search by model number and get the right part shipped fast.