
Dryer Drum Seals — What Fixes Rubbing, Squeaking, and Burning Smells
Need the replacement part? Search your model number at for guaranteed fit and fast free shipping.
Understanding the Problem
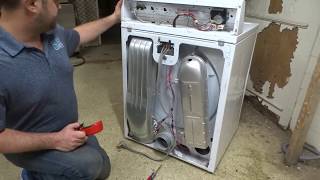
Drum seals (also called felt seals or drum felts) sit between the dryer drum and the front/rear bulkheads to keep the drum centered and prevent fabric and hot air from rubbing on metal. Over time these seals wear, compress, tear or detach. When that happens the drum can rub against the bulkhead or the seal itself causing noise, rubbing marks on clothing, increased lint, hot spots, or even a burnt smell. Worn seals also allow more air to bypass the drum and can reduce drying efficiency. Repair usually involves replacing the front and/or rear drum seals and inspecting drum rollers/axle and the bulkhead for scoring. In many models the felt seals are inexpensive and straightforward to replace for a competent DIYer, but some models require partial disassembly of the cabinet and removal of the drum.
Common Symptoms
Squeaking or grinding noise during rotation, rubbing or scuff marks on clothes or drum edge, burning or musty smell, visible torn or missing felt seals, increased lint buildup and reduced drying performance.
Common Causes
- Normal wear and compression of felt seals over years of use
- Heat damage from high dryer temperatures or restricted venting causing seals to harden or melt
- Drum misalignment due to worn rollers, bearings, or a damaged axle putting extra pressure on seals
Popular Parts That Fix This Problem
These are the most common replacement parts that fix this problem. When you're ready to order, click below to find the right part at ProsourceParts.com — just search by your appliance model number for a guaranteed fit.

Helpful Repair Tip
Confirm the seal is the problem by stopping the dryer with the drum at different rotations and inspecting the contact area for worn felt, shiny metal, or scuff marks; also reach in (power off) and rock the drum to see side-to-side play — excessive lateral movement usually means seals (or rollers/axle) are worn.
Frequently Asked Questions
How do I tell if the drum seal is the part making the noise?
Turn the dryer off and unplug it. Spin the drum by hand and listen for scraping or rubbing; put your hand near the front and rear openings to feel where the drum contacts the cabinet. Visually inspect the felt seals—if they are compressed, torn, missing, or there's shiny metal or scoring on the bulkhead/drum edge, the seals are likely responsible. Also check for excessive lateral play in the drum; if the drum shifts side-to-side more than about 1/4 inch, seals and/or rollers may be worn.
Can I replace drum seals myself and how long does it take?
Yes — many dryers have accessible front and rear seals and a competent DIYer can replace them in 45–90 minutes. Some models require removing the top, front panel, or drum, which adds time. Always unplug the dryer and consult a model-specific service manual or a trusted repair guide. Replace or inspect drum rollers, idler, and bearings at the same time if they show wear, since those components commonly fail together.
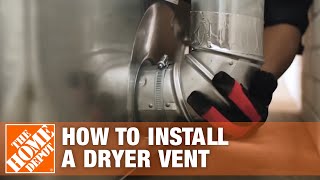
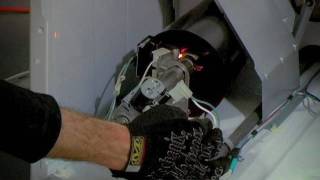
Related How-To Videos

Real DIY Repair Stories
Be the first to share your repair story!
Share Your Repair Story
Your experience helps other homeowners fix their appliances. Tell us how it went!
Can't Fix It Yourself? Find a Local Technician
It's perfectly okay to call a professional. Some repairs require specialized tools, deep teardowns, or dealing with complex systems that are better left to the pros.

Find the Right Part for Your Appliance
Don't guess — search your exact appliance model number at ProsourceParts.com to find the correct OEM compatible replacement part. They offer fast free shipping, guaranteed fit, and thousands of parts in stock.
Your Free Parts Videos
Whether your dishwasher won't drain, your dryer stopped heating, or your fridge isn't cold, we've created simple repair guides for the most common appliance problems homeowners face. Each guide explains what's going wrong, the most likely causes, and which replacement parts fix the issue. When you're ready to order, we link directly to ProsourceParts.com where you can search by model number and get the right part shipped fast.