
Bosch WDT750SAHV0 Dishwasher — Common Problems and How to Fix Them
Need the replacement part? Search your model number at for guaranteed fit and fast free shipping.
Understanding the Problem
Brief overview: The Bosch WDT750SAHV0 is a common built‑in dishwasher. Typical service calls are: won't start, won't fill with water, won't drain, leaks (E15), poor cleaning, and loud/rumbling operation. Below are step‑by‑step diagnostics and practical repair actions for each major symptom. 1) General diagnostic checklist (do these first): 1.1. Check power: make sure dishwasher is plugged in, circuit breaker is on, and outlet is live. Try another device on that outlet. 1.2. Check door latch: dishwasher won't start if latch/door switch doesn't engage. Inspect visually and listen for the latch click when closing the door. 1.3. Check control lock / child lock: if lock is on, front panel commands are ignored — cancel lock per manual. 1.4. Enter diagnostics / error codes: Bosch models flash a sequence or show E‑codes; note any blinking pattern and look up code. A short power cycle (turn off breaker 1 minute) can clear some faults temporarily. 2) Symptom — Dishwasher won’t start or won’t respond: 2.1. Verify door latch/switch: open bottom kick panel, inspect latch for broken hooks, replace latch if damaged. 2.2. Test continuity: unplug and use a multimeter to test door switch and control board connectors for obvious burns or loose wires. 2.3. Check thermal fuse / control board: if door latch and power are fine but nothing powers up, the control board or thermal cutout may be bad — inspect board for blown components or water damage; replace board if required. 3) Symptom — Unit won’t fill or has low water: 3.1. Confirm home water supply valve is fully open and inlet hose not kinked. 3.2. Inspect the water inlet valve/strainer: shut off water, disconnect inlet hose, remove and clean the small screen/strainer at the valve inlet. 3.3. Test inlet solenoid: with power off, check solenoid coil for continuity. If coil open or valve doesn’t actuate, replace the water inlet valve assembly. 4) Symptom — Unit won’t drain or shows standing water: 4.1. Remove bottom rack and clean filter chamber; debris and broken glass often block the chopper or filter. 4.2. Check drain hose routing and house plumbing: hose should rise to high loop or air gap and not be kinked; verify disposal knockout (if recently installed) is removed. 4.3. Test drain pump: start a drain cycle and listen — you should hear the pump running. If you hear humming but no water flow, pump impeller is clogged or pump is failing. Remove and inspect pump, clear debris or replace pump assembly. 5) Symptom — Leaks or E15 (water detected in base): 5.1. Inspect door gasket and tub seam for cracks, tears or food buildup; clean or replace gasket as needed. 5.2. Check float/float switch and sump for damage; a stuck float can cause continuous fill or overflow. 5.3. If E15/light indicates water in the base, remove bottom toe plate, drain base with towels, find source (hose clamp, spray arm hole, loose connection) and replace faulty part. Replace moisture sensor switch if it’s falsely detecting water. 6) Symptom — Poor cleaning / dishes still dirty: 6.1. Clean filter and fine screen assembly – do this regularly. Remove and rinse under hot water. 6.2. Inspect spray arms for clogged holes and ensure they spin freely; remove and soak in vinegar if mineral scale present. 6.3. Check detergent dispenser operation and water temperature (should be ~120°F / 49°C minimum at the machine). Low incoming water temperature or a failed circulation pump reduces cleaning. 7) Symptom — Loud grinding, rattling, or whining: 7.1. Remove lower spray arm and filter assembly and inspect chopper area and pump impeller for hard objects or broken plastic. 7.2. If noise comes from motor during pump operation, the circulation or drain pump bearings may be failing — replace the affected pump/motor assembly. 8) Replacement steps (example: replacing drain pump): 8.1. Safety first: disconnect dishwasher from power and turn off water supply. 8.2. Remove lower kick plate and tip the dishwasher forward (if pull-out) or slide unit out enough to access underside. 8.3. Disconnect electrical connector(s) and drain hose from pump; note hose positions or take photos. 8.4. Remove mounting screws/clips holding pump to sump and pull pump free; replace with new pump and reverse removal steps. 8.5. Restore power and run a quick drain cycle to verify operation and check for leaks. 9) Replacement steps (example: replacing water inlet valve): 9.1. Turn off water and power. Access valve (usually lower front behind kickplate). 9.2. Disconnect inlet hose and electrical connectors, remove mounting screws and replace with new valve. Reconnect hose and power, test for fill and leaks. Safety note: Always disconnect power at the circuit breaker and turn off the water supply before opening panels, removing pumps, or disconnecting hoses. If you are not comfortable working with electrical components or lifting the dishwasher, hire a qualified appliance technician. Replace parts only with correct OEM or equivalent parts matched to your exact model and serial.
Common Symptoms
Dishwasher won't start, won't fill, won't drain/standing water, leaks (E15), poor cleaning, loud noise during cycles.
Common Causes
- Clogged filters, spray arms, or chopper assembly causing poor wash or drainage
- Failed drain or circulation pump motor (wear, jammed impeller, debris)
- Faulty water inlet valve, door latch, float switch, or control board leading to fill/start/overflow issues
Popular Parts That Fix This Problem
These are the most common replacement parts that fix this problem. When you're ready to order, click below to find the right part at ProsourceParts.com — just search by your appliance model number for a guaranteed fit.

Helpful Repair Tip
Before buying parts, run a diagnostics cycle and listen: a humming/noise during drain indicates a bad drain pump; no humming and no fill suggests inlet valve or water supply issue. Photograph wiring and hose runs before disassembly and verify replacement part numbers against your dishwasher’s model tag.
Frequently Asked Questions
How do I reset my Bosch WDT750SAHV0 dishwasher?
To reset: open the door and press the Start button (or press Cancel on some models) to drain and cancel the cycle. For a power reset, turn the dishwasher’s circuit breaker off for 60 seconds and then back on. If an electronic fault persists, note any error code and consult the service diagnostics — persistent errors may indicate a failed sensor or control board.
What does an E15 error or water in base mean and how do I fix it?
E15 means water has been detected in the base pan. Turn off power and water, remove the toe kick, and carefully dry the base. Inspect hoses, clamps, door seal, and tub for leaks; check the float and moisture sensor for damage. Fix the leak source, then replace any water‑damaged components (valves, clamps, gaskets, or the moisture sensor). If you can’t find the leak source, call a technician — leaving the unit powered with water in the base can damage electronics.
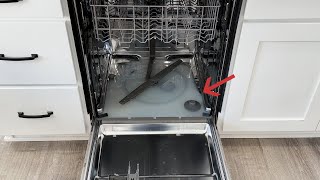
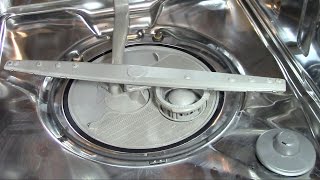
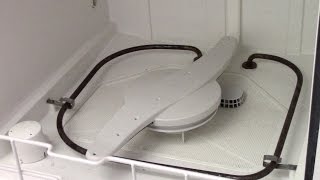
Related How-To Videos



Real DIY Repair Stories
Be the first to share your repair story!
Share Your Repair Story
Your experience helps other homeowners fix their appliances. Tell us how it went!
Can't Fix It Yourself? Find a Local Technician
It's perfectly okay to call a professional. Some repairs require specialized tools, deep teardowns, or dealing with complex systems that are better left to the pros.

Find the Right Part for Your Appliance
Don't guess — search your exact appliance model number at ProsourceParts.com to find the correct OEM compatible replacement part. They offer fast free shipping, guaranteed fit, and thousands of parts in stock.
Your Free Parts Videos
Whether your dishwasher won't drain, your dryer stopped heating, or your fridge isn't cold, we've created simple repair guides for the most common appliance problems homeowners face. Each guide explains what's going wrong, the most likely causes, and which replacement parts fix the issue. When you're ready to order, we link directly to ProsourceParts.com where you can search by model number and get the right part shipped fast.