
AGM679W2 Gas Range — Repair Guide & Common Part Fixes
Need the replacement part? Search your model number at for guaranteed fit and fast free shipping.
Understanding the Problem
AGM679W2 is commonly used as a 30" gas range model designation (manufacturers vary). The most frequent service issues are: oven won’t heat or lights then shuts off, surface burners won’t ignite or spark intermittently, and oven temperature is incorrect. Below are systematic diagnostics and repair steps you can follow. 1) Oven won’t heat / igniter glows but gas doesn’t open - Likely cause: weakened or failing bake (glow) igniter that no longer draws enough current to open the oven safety/gas valve. - How to check: With the oven on BAKE, observe the igniter through the broiler/opening. If it glows faintly or never gets very bright and the gas valve never opens, suspect the igniter. Use an ammeter (clamp) on the igniter lead — a good igniter will draw ~3.0–3.6 A (varies by model). If <2.5 A, replace the igniter. - How to fix: Cut power to the range and, if required by your utility, turn off the gas at the supply valve. Access the oven bottom (remove racks and the bottom panel). Unplug the igniter connector or remove the wire nuts, unscrew the igniter assembly from the burner tube, and replace with the correct new igniter. Reassemble, restore gas and power, and test. 2) Oven lights then shuts off / delayed ignition - Likely cause: failing igniter or weak gas valve. The igniter may glow but take too long to reach required current, causing repeated safety shutdown. - Diagnostics: Same ammeter test as above; also look for flame roll-out or gas smells (if you smell gas, stop and shut off gas immediately). - Fix: Replace igniter first. If symptoms continue, the oven gas safety valve may be defective — consult model-specific part numbers and replace valve only if necessary. 3) Surface burners won’t ignite or spark intermittently - Likely cause: clogged burner ports, faulty spark electrode, defective spark module/igniter switch, or ignition switch on the knob assembly. - Diagnostics: Clean burner caps and ports (remove grease and debris). With power on, push a surface igniter switch — you should hear a rapid clicking and see a spark at the electrode. If there’s clicking but no spark, replace the ignition module or electrode. If no clicking, test the switch and wiring. - Fix: Clean ports; replace surface igniter electrode or ignition module if faulty. For stubborn failures, replace the knob switch if it’s not sending signal. 4) Oven temperature runs too hot or too cold - Likely cause: bad oven temperature sensor (NTC/RTD) or faulty electronic control board/thermostat calibration. - Diagnostics: Remove sensor and measure resistance cold (typically ~1000 ohms at 70°F for many sensors — check spec for your sensor). If out of range, replace sensor. You can also test with an external oven thermometer and compare with set temperature. - Fix: Replace the sensor if resistance is out-of-spec. If sensor is good, consider replacing the electronic control board or performing a temperature calibration if the board supports it. 5) Control/display problems or lockout - Likely cause: control board failure or stuck keypad/lock function. - Diagnostics: Power-cycle the range. Check for error codes (refer to user manual/model-specific codes). Test keypad switches for continuity. - Fix: If keypad is non-responsive and board is fine, replace the user interface/keypad. If board displays errors or won’t respond after reset, replace the control board. Step-by-step example: Replacing a bake igniter 1. Disconnect power at the breaker and shut off the gas supply (safety first). 2. Remove oven racks and the oven bottom panel (usually held by screws). 3. Locate the igniter mounted on the burner tube at the oven bottom. 4. Disconnect the igniter connector (or cut power leads if connector not present) and unscrew the igniter mounting screws. 5. Transfer any mounting bracket or shield to the new igniter and secure the new igniter to the burner tube. 6. Reconnect the wiring (ensure tight, correct connections) and reinstall the bottom panel and racks. 7. Restore gas and power. Test by setting oven to BAKE and confirm a steady bright glow from the igniter and that the oven lights within a minute or two. Safety note: Always disconnect electric power at the breaker before servicing, and turn off the gas supply when working on gas components. If you smell gas at any time, stop, ventilate the area, leave the building, and call your gas utility or emergency services.
Common Symptoms
Oven won’t heat or lights then shuts off; surface burners don’t ignite or spark intermittently; oven runs hot or cold; control/display errors or unresponsive keypad.
Common Causes
- Weakened or failed bake (glow) igniter
- Faulty oven safety/gas valve or ignition module
- Defective temperature sensor or electronic control board
Popular Parts That Fix This Problem
These are the most common replacement parts that fix this problem. When you're ready to order, click below to find the right part at ProsourceParts.com — just search by your appliance model number for a guaranteed fit.

Helpful Repair Tip
If the bake igniter glows dimly or very slowly but the oven never lights, the igniter is almost always the culprit — measure its current draw: <2.5 A indicates replacement.
Frequently Asked Questions
How do I confirm the bake igniter is the problem?
Set the oven to BAKE and observe the igniter through the broiler or oven opening. If it never glows or only glows dimly and the oven doesn’t light, that’s a strong sign. For a definitive test use a clamp ammeter on the igniter lead while calling for heat — typically a good igniter draws about 3.0–3.6 A; anything substantially lower means replace it.
Can I replace these parts myself or should I call a technician?
Many homeowners with basic mechanical skills can replace igniters, sensors, and spark electrodes by cutting power, following the steps above, and using basic hand tools. However, if you smell gas, are unsure about turning off the gas supply, or the repair requires replacing the gas valve or working with internal gas lines, call a qualified technician for safety and local code compliance.
Related How-To Videos
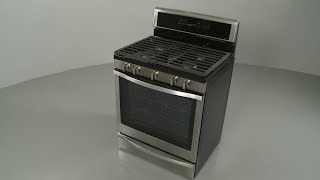

Real DIY Repair Stories
Be the first to share your repair story!
Share Your Repair Story
Your experience helps other homeowners fix their appliances. Tell us how it went!
Can't Fix It Yourself? Find a Local Technician
It's perfectly okay to call a professional. Some repairs require specialized tools, deep teardowns, or dealing with complex systems that are better left to the pros.

Find the Right Part for Your Appliance
Don't guess — search your exact appliance model number at ProsourceParts.com to find the correct OEM compatible replacement part. They offer fast free shipping, guaranteed fit, and thousands of parts in stock.
Your Free Parts Videos
Whether your dishwasher won't drain, your dryer stopped heating, or your fridge isn't cold, we've created simple repair guides for the most common appliance problems homeowners face. Each guide explains what's going wrong, the most likely causes, and which replacement parts fix the issue. When you're ready to order, we link directly to ProsourceParts.com where you can search by model number and get the right part shipped fast.